How to Make a Gantt Chart in Word
November 4, 2025 / Estimated reading time: 8 minutes

Audio version:
To make a Gantt chart people usually resort to different tools. Among them, for instance, are popular Microsoft tools. We have already explained how to create a Gantt chart in Excel, MS Project, Google Sheets, and PowerPoint in our previous articles. However, it may be the case that you are used to working in Word and would like to make your Gantt chart there.
That is why in this article, we offer you a simple solution on how to create the chart in this tool and cover the following aspects:
- How to create a Gantt chart in Word
- Gantt chart template in Word
- How to export a Gantt chart from MS Project to Word
- How to make a Gantt chart easily and fast
If this is the first time you have to deal with Gantt charts at all, we recommend you to first read the guide that explains what a Gantt chart is. Besides, it may be useful to see Gantt chart examples before creating one.
In short, a Gantt chart is a tool that helps you manage projects, plan tasks, and organize your workflow. It is displayed as a bar chart with the vertical axis containing the task list and the horizontal axis with a timeline. The horizontal bars between these axes represent projects, tasks, or subtasks and their length depends on their duration.
How to create a Gantt chart in Word
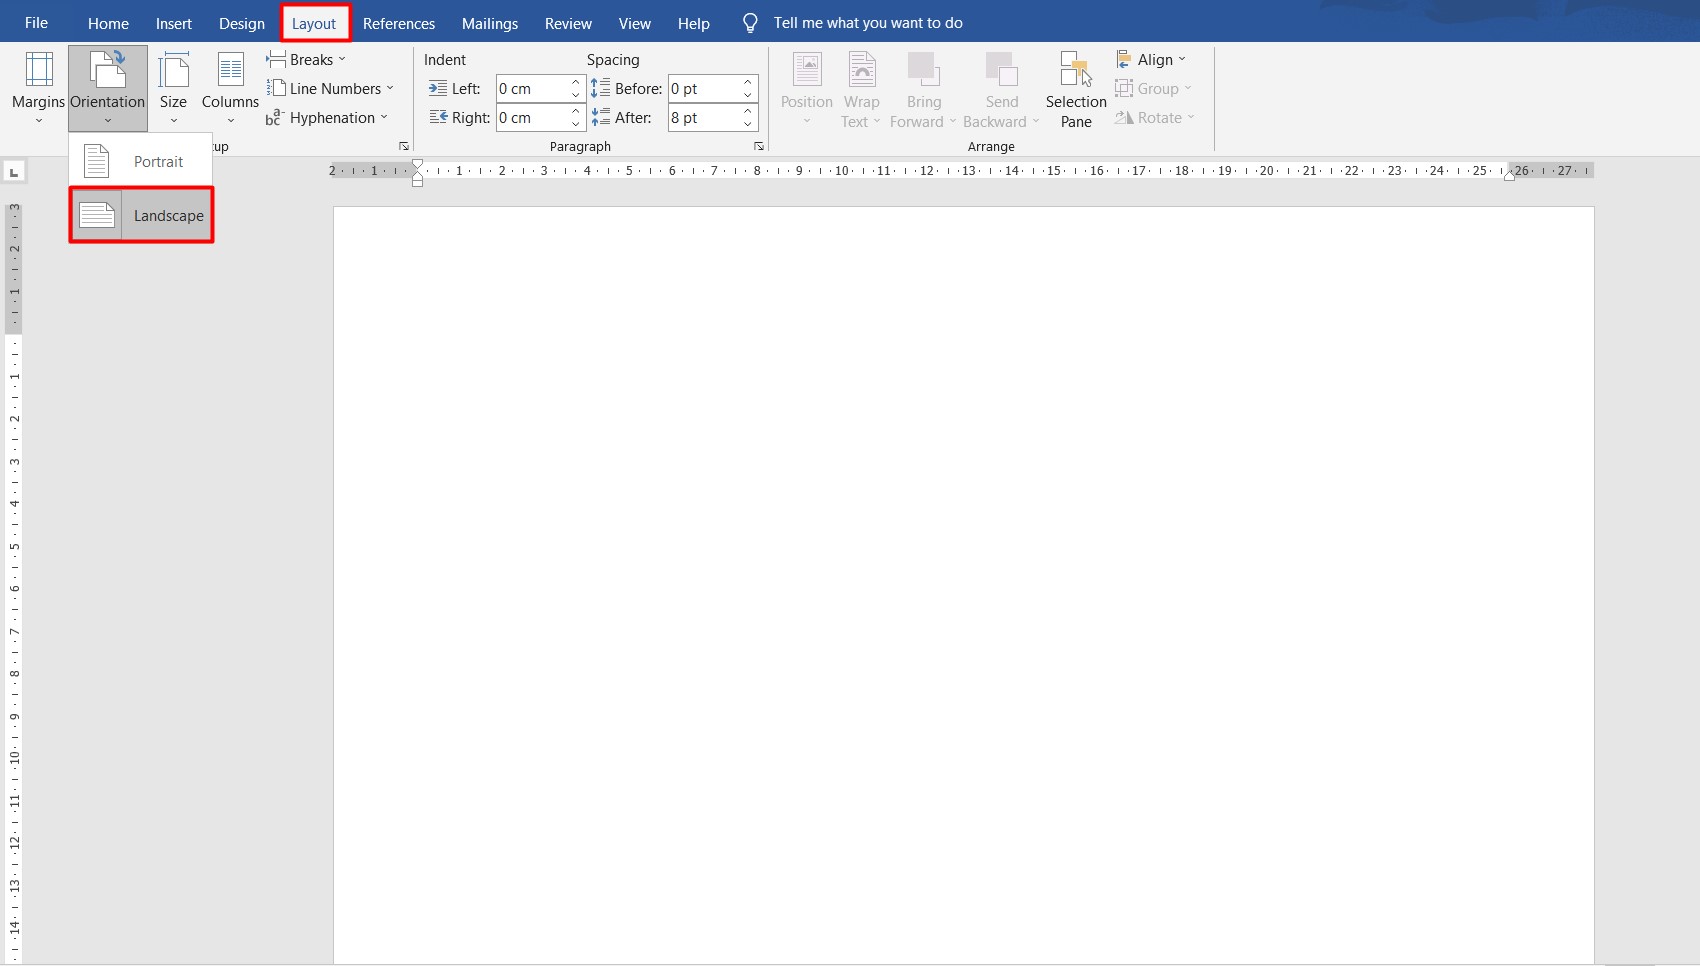
Before you start creating a Gantt chart in Word, you need to prepare a list of project tasks. Once you are done with it, go to Word. Since a Gantt chart requires a timeline, you’ll need more space. Therefore, it is better to change the page orientation.
To do this, go to Layout → Orientation → Landscape.
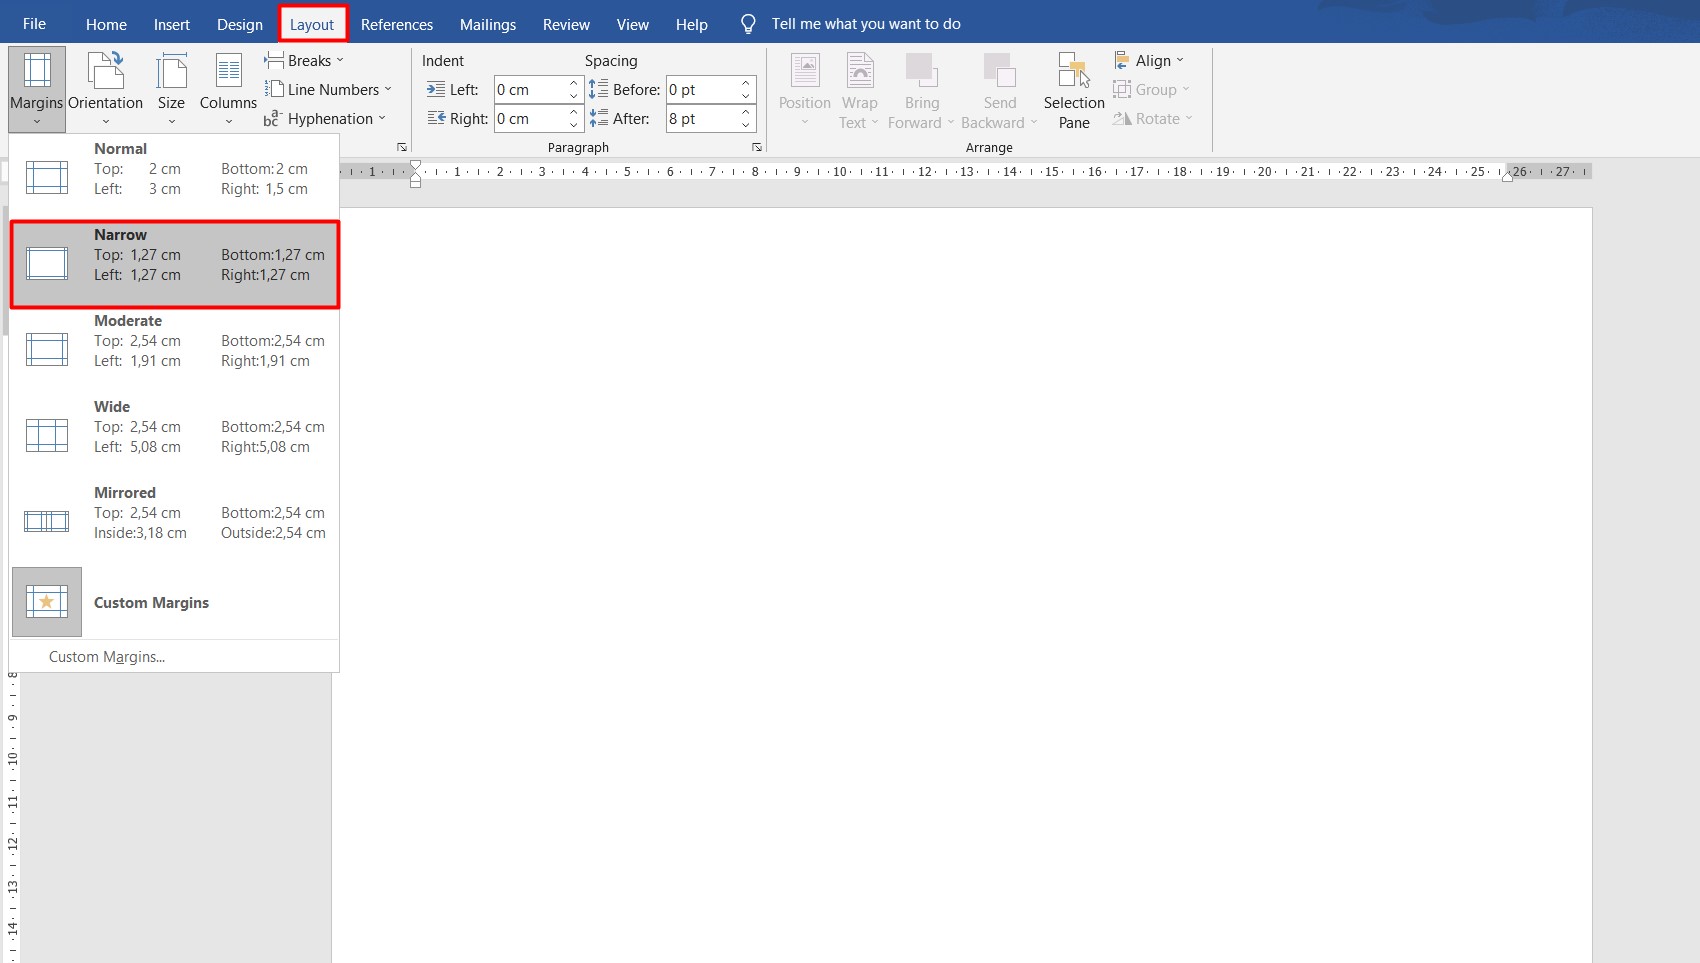
In order to make the most of the page space, you can also reduce the margins. To do this, go back to the Layout tab, select Margins, and then Narrow.
In this example, I will be making a Gantt chart for a one-month time range, but it can be done for several days or months following the same steps.
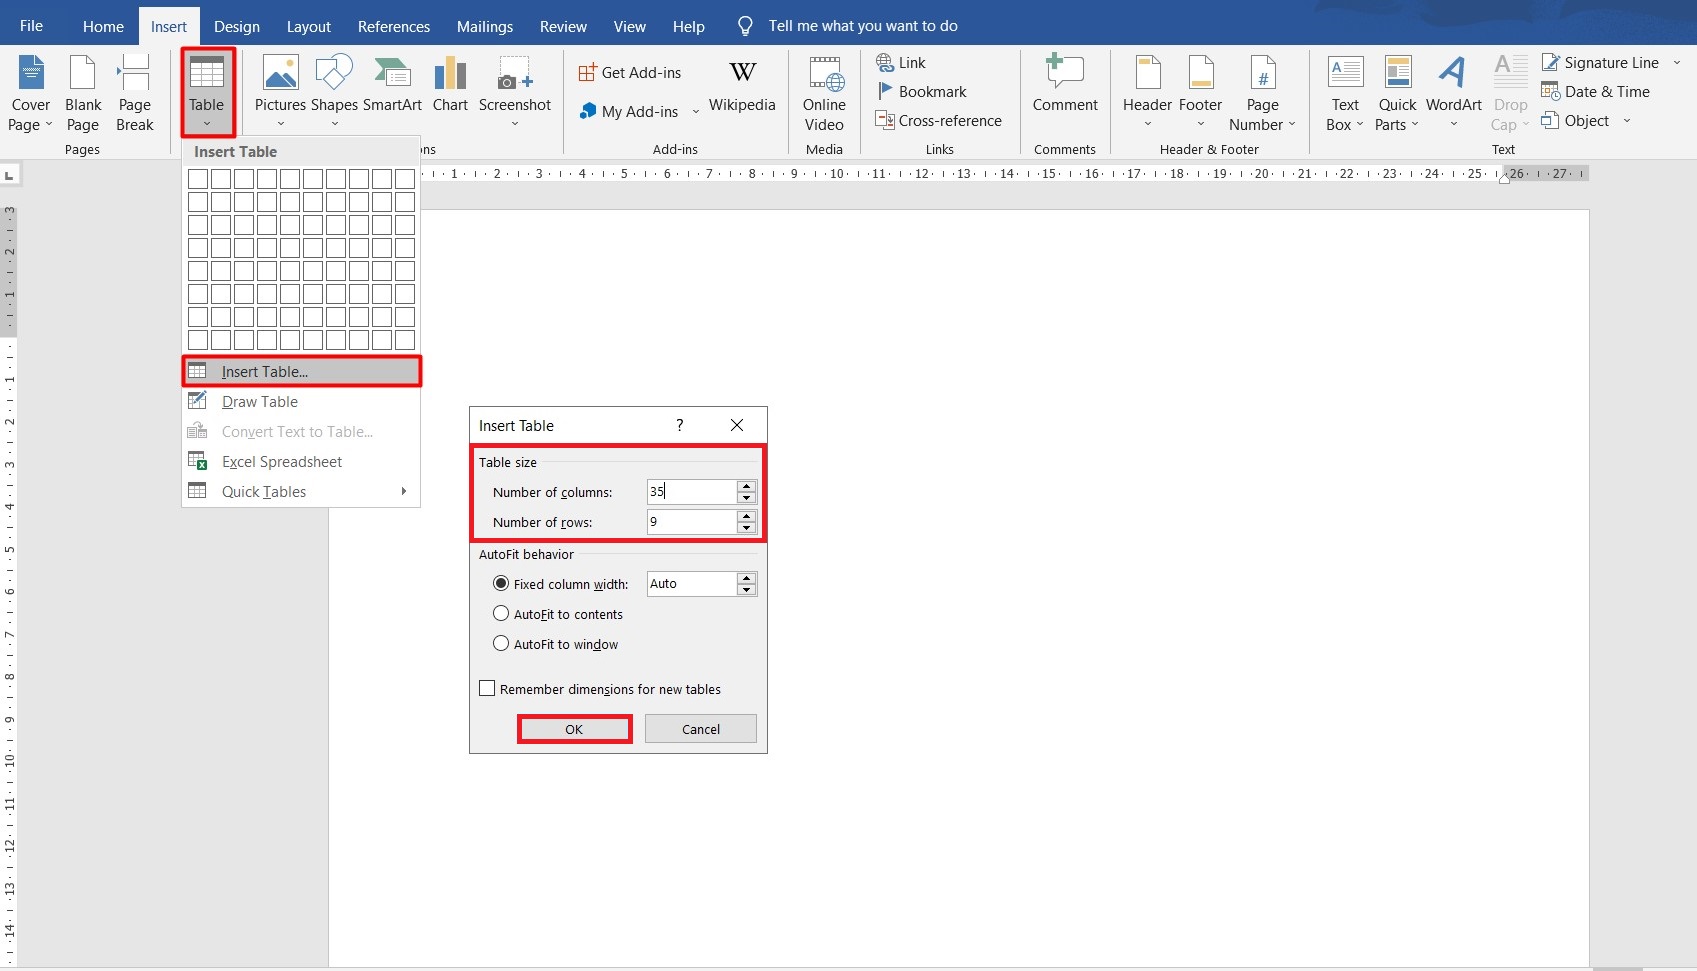
On top of the table, which is basically the timescale, let’s put the days, and on the left, insert the list of tasks. Before inserting the table, I would recommend leaving some space to add the name of the graph there afterward. Just press Enter and the cursor will move further down. To insert the table, open the Insert tab, select Table and Insert table to manually select the number of cells in the table according to the number of days and tasks.
So, choose Insert → Table → Insert table.
In my case, it will be 31 days and 8 tasks. In the Insert table window, I am going to select 35 columns (4 more columns to include the tasks) and 9 rows (1 more row to list the days) and click OK.
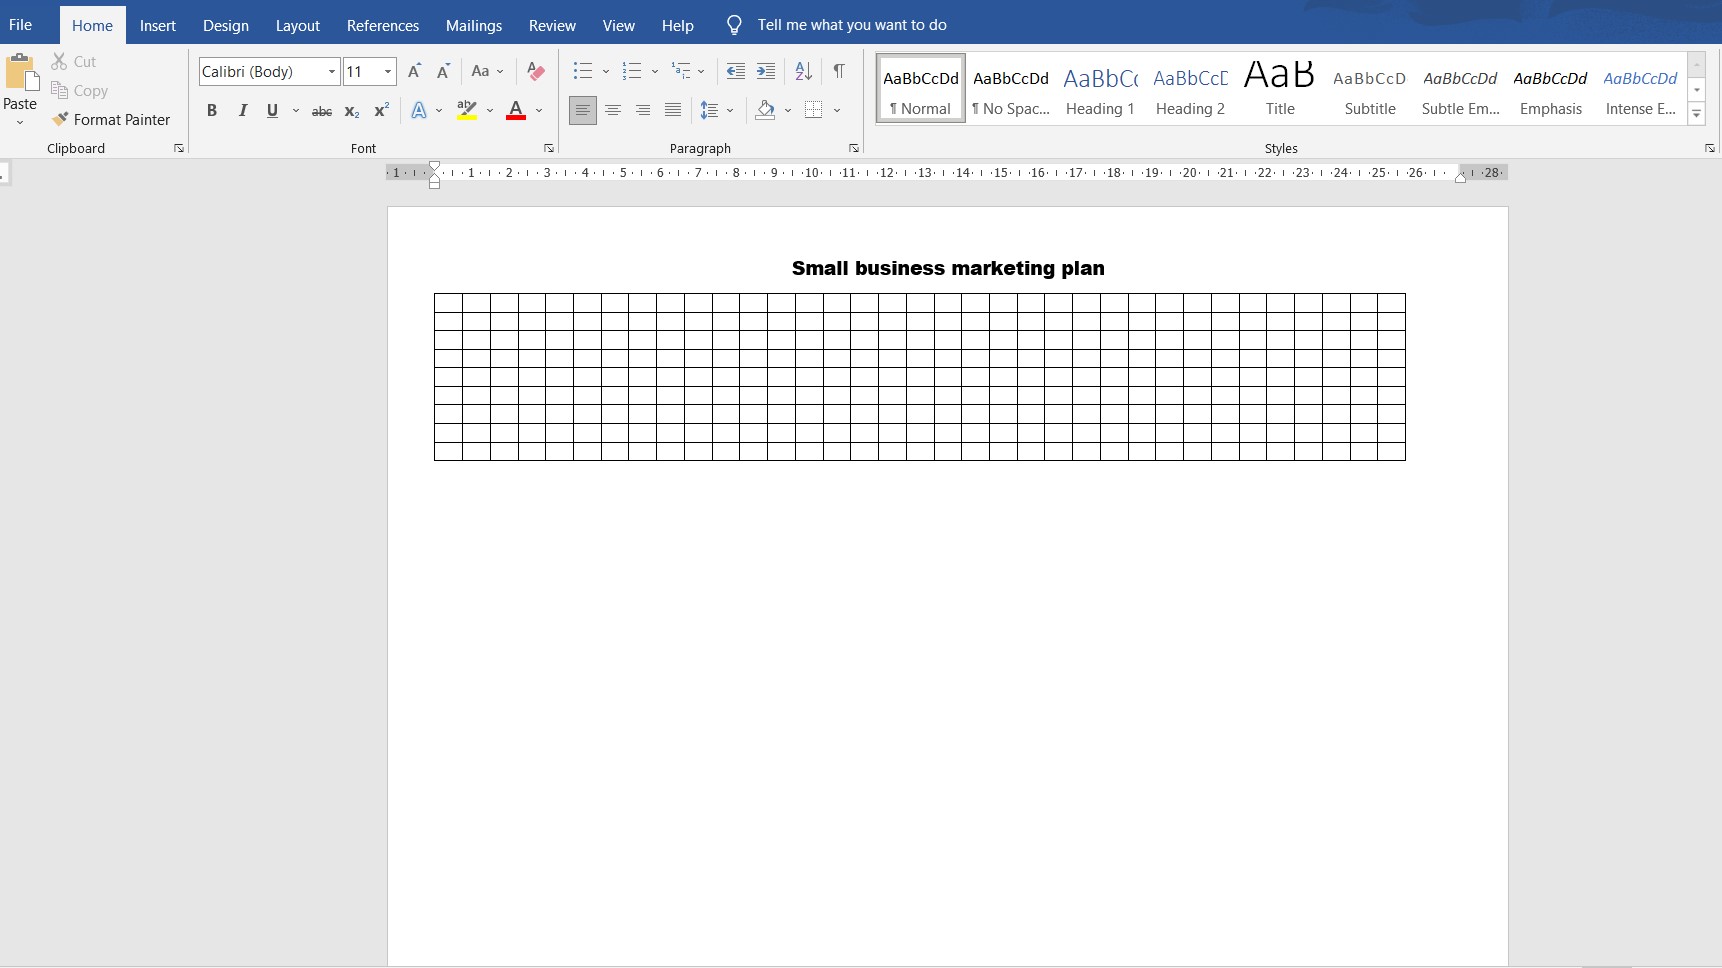
Now you may introduce the name of the graphic.
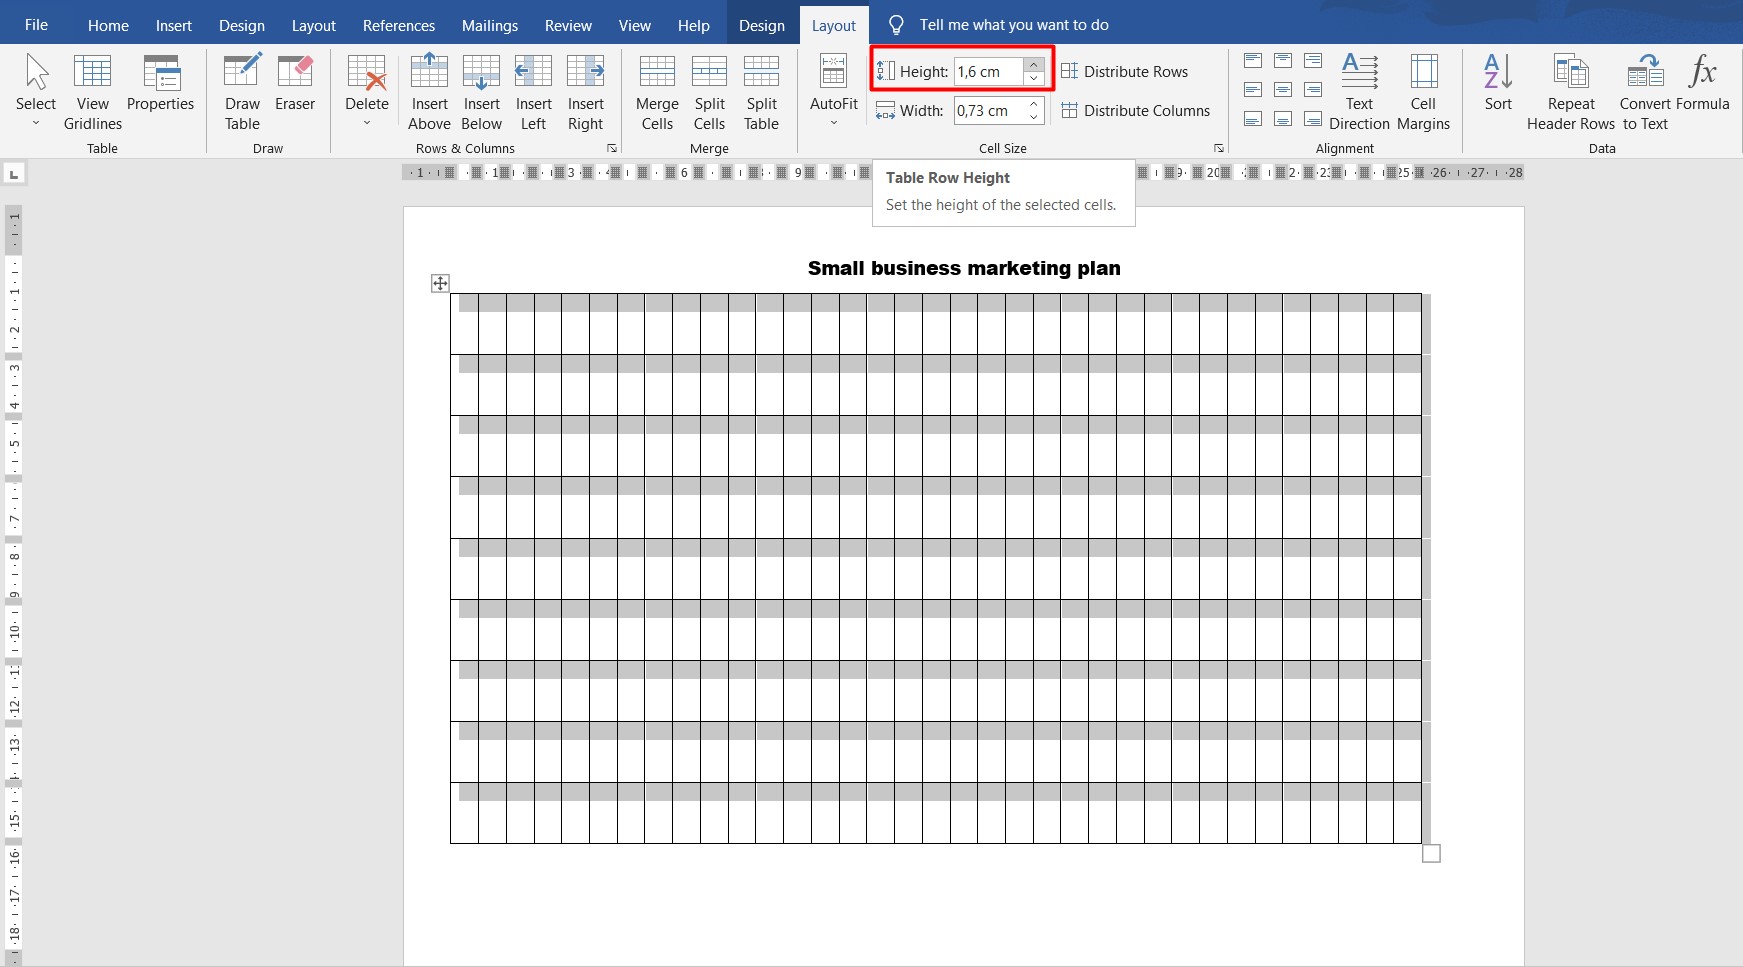
Let’s move to table editing. Highlight the table and select Layout. Here you can set the height and the width of the rows. Depending on the number of tasks and columns you have, you can choose the size that is suitable for you. To configure it, simply click on the arrows for the Height and you will see how the size changes.
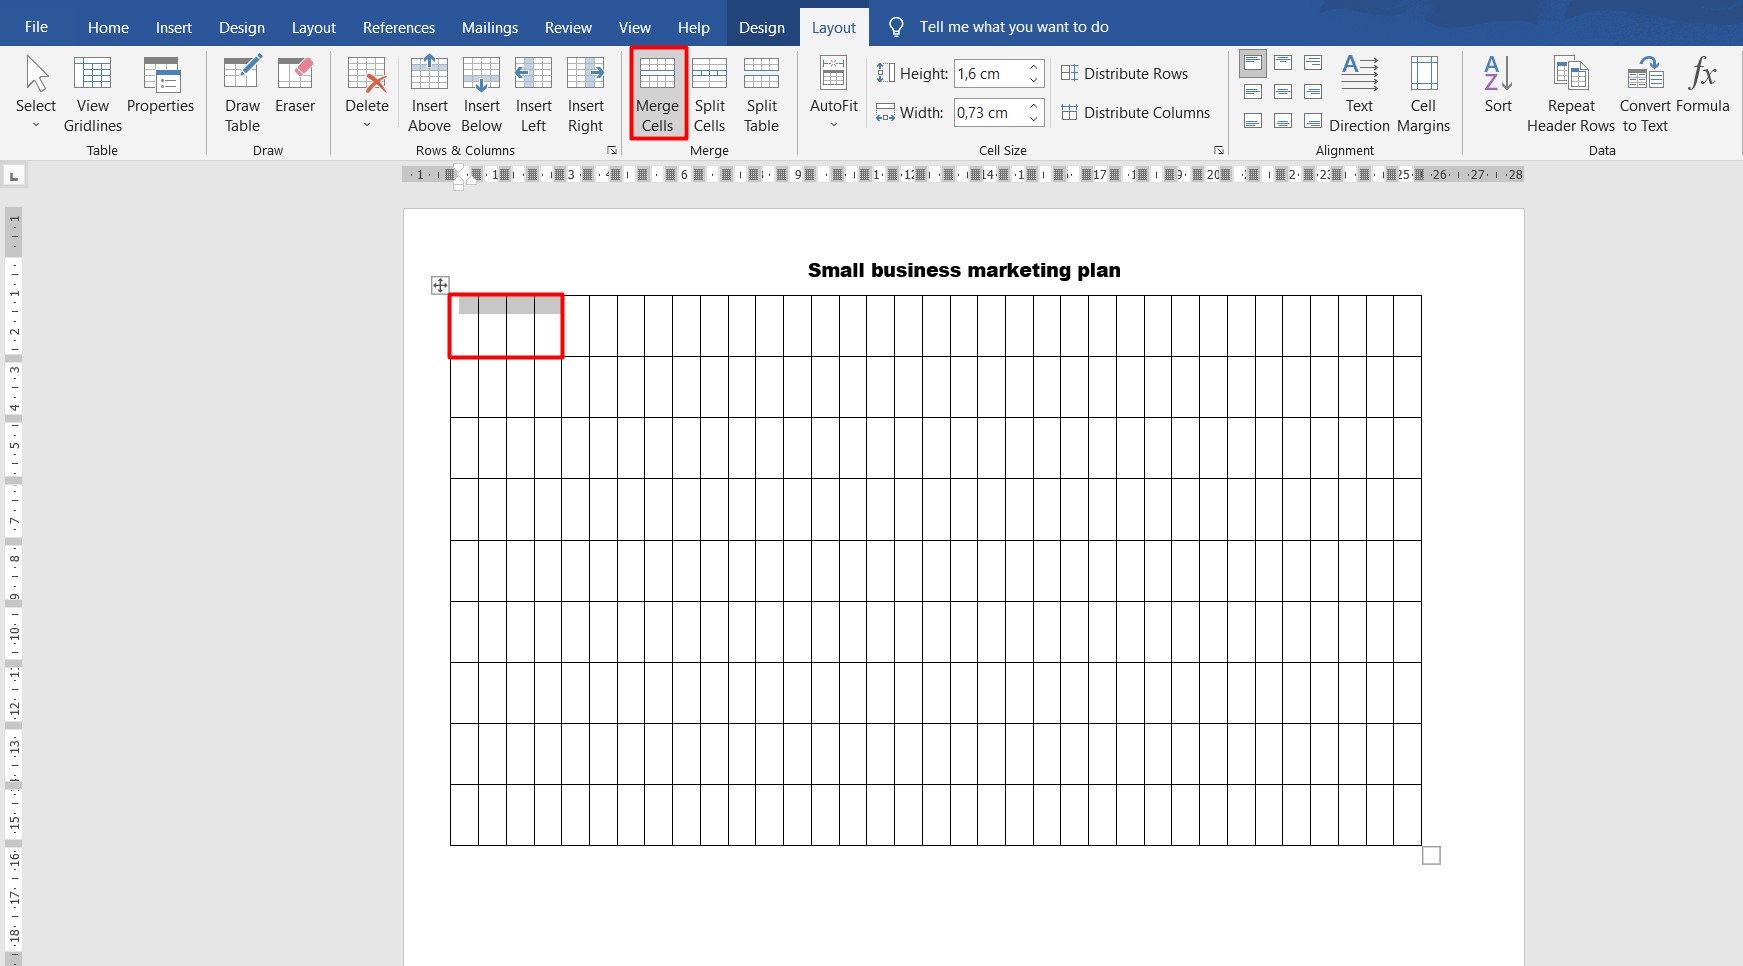
To insert the list with the tasks, select the first four rows and click on Merge Cells.
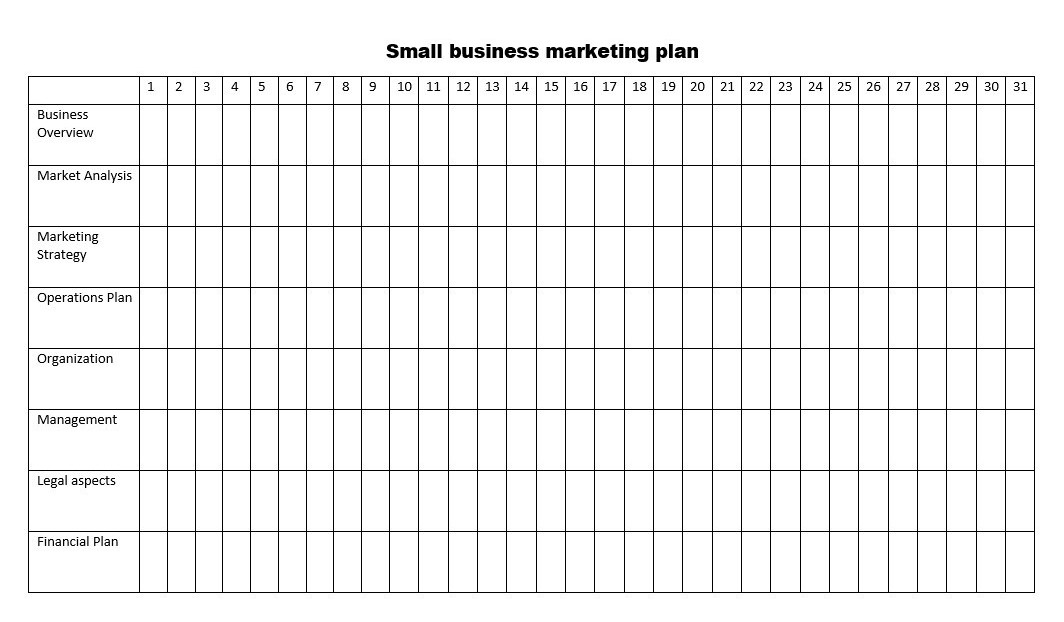
You can repeat the same with all the rows and thus obtain the space to add the tasks. In the cells on the top of the table, you can add numbers from 1 to 31 which are the days of the month, and reduce the size of the first row, since you won’t require so much space there. In the merged rows, you may add the list of tasks you’ve prepared in the beginning.
Now your table should look like this.
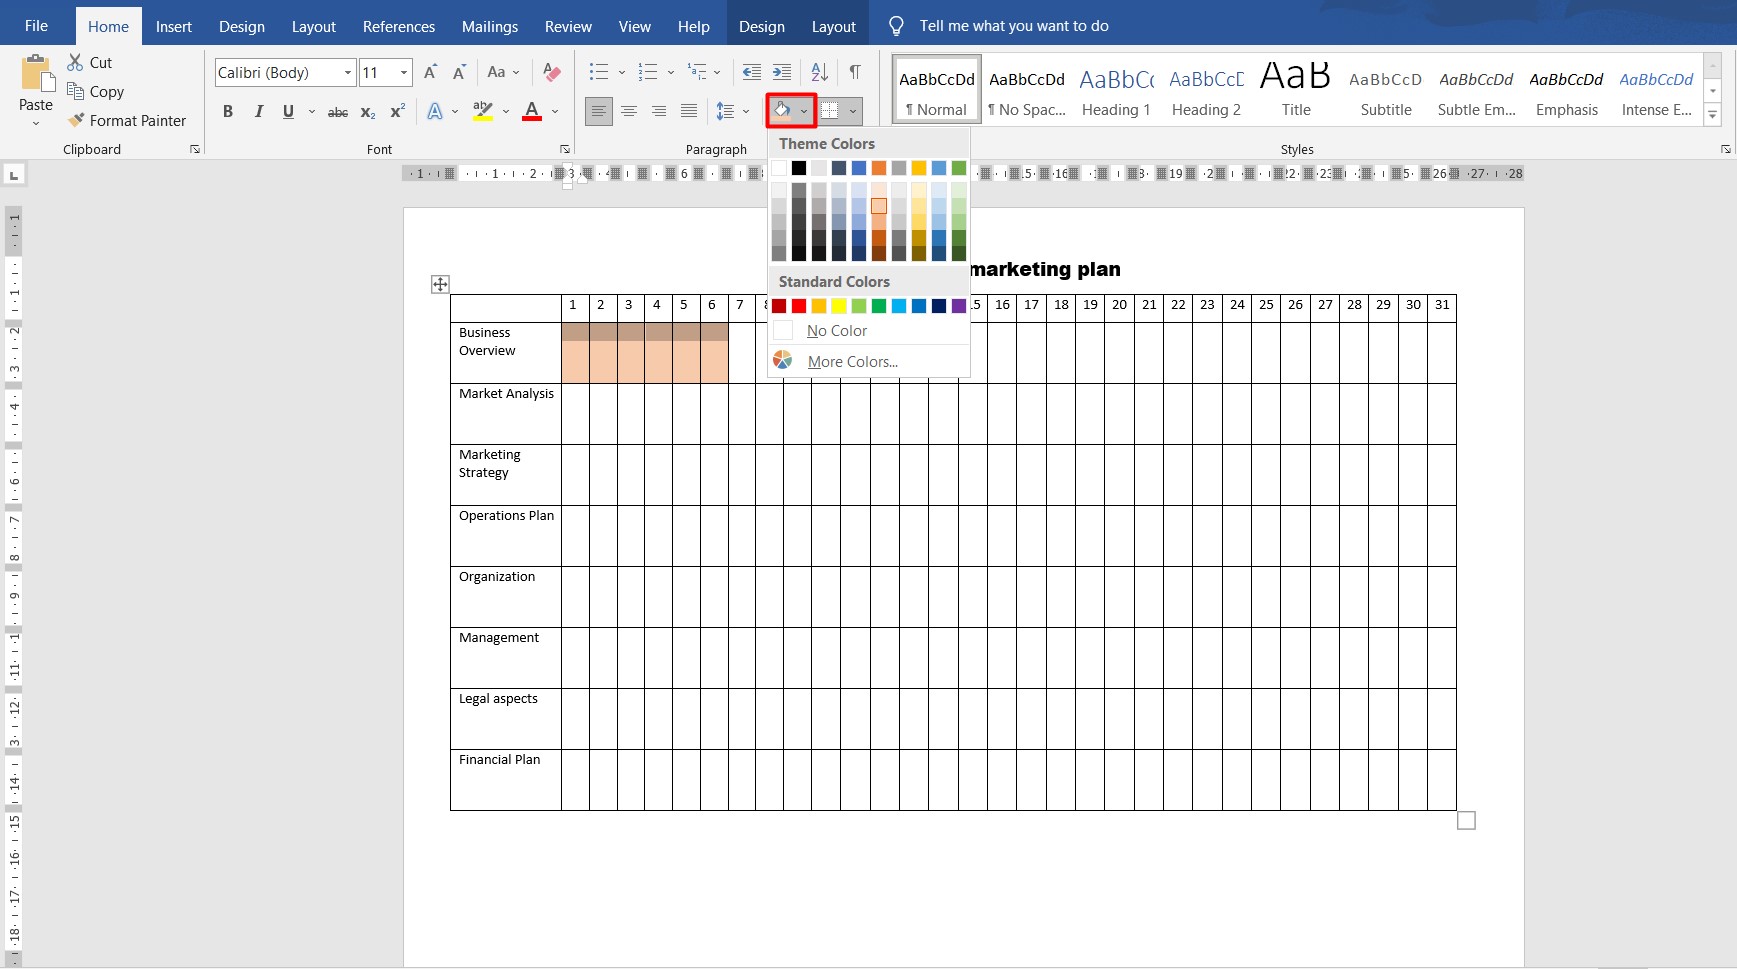
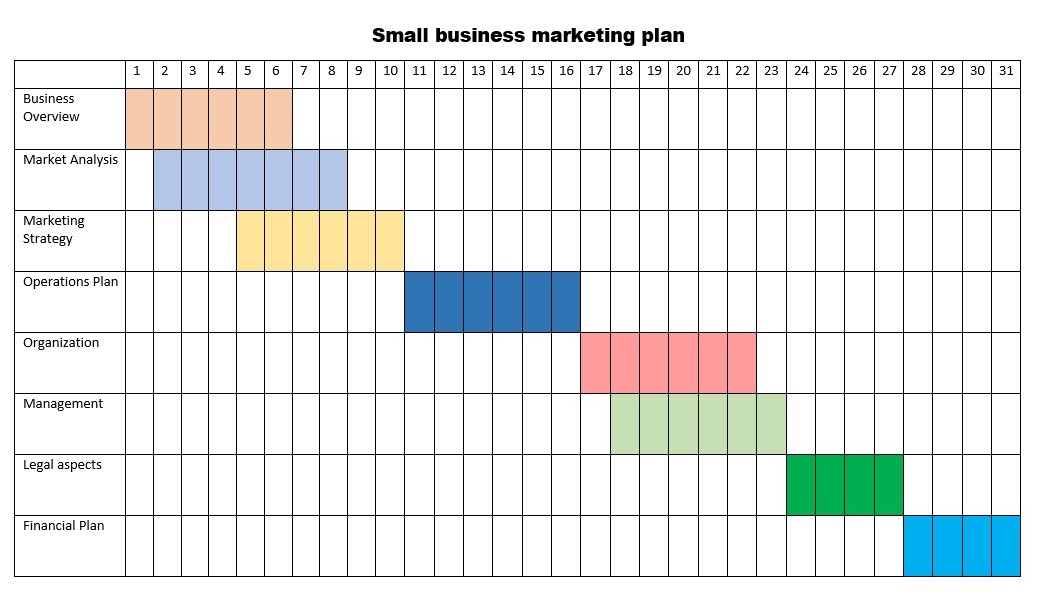
Only one step left for our Gantt chart in Word to be complete! Add the bars that represent the duration of the tasks. To do this, highlight the necessary columns for each task according to the time planned for each of them. For example, in my plan, I intend to spend 6 days on ‘Business Description’ activities. That’s why I select 6 cells. Then, choose a Theme Color.
You can further do the same for each task, choosing different colors to make each task easier to follow. The result will look like this.
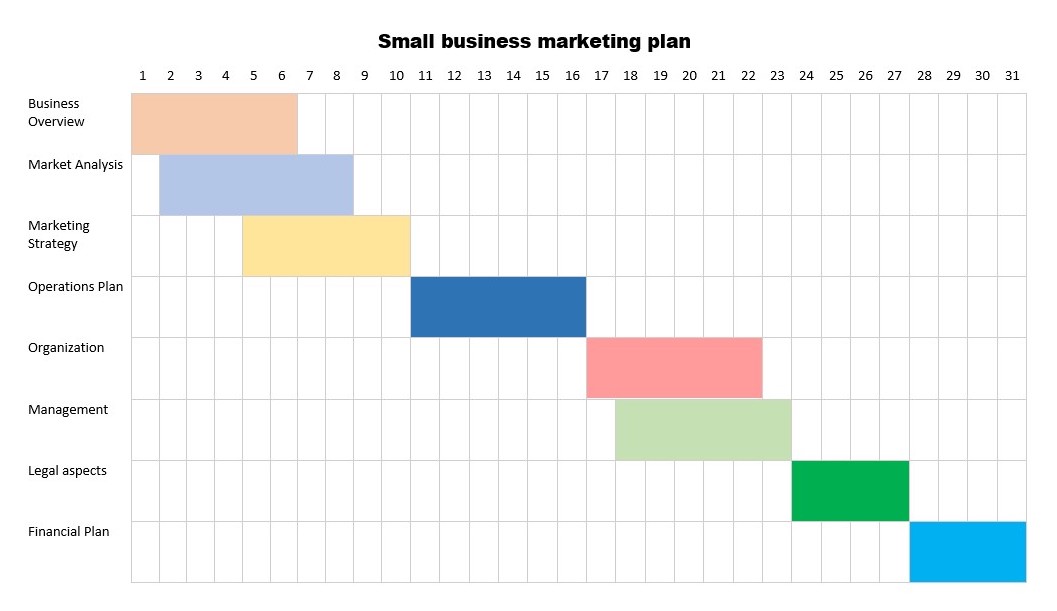
You can also format your Gantt chart in Word. For example, you can remove the borders of the task list and of the timescale above the table. To do this you have to go to the Design tab and uncheck the edges that need to be removed.
Then you can select the color bars one by one and merge the cells. To do this choose Layout → Merge Cells.
And finally, you can make the background stripes less visible. To do this, highlight the entire space with the colored bars, and with the right-click select Table Properties. In the dialogue window, go to the Table section, click on Borders and shading, choose some light color, and click OK.
There it is. Now you know how to create a Gantt chart in Word.
This video tutorial highlights the key steps.
Gantt chart template in Word
Unfortunately, Microsoft text editor does not offer Word Gantt chart templates. The good news is that you can make your own template, following the steps of this tutorial, and save it. That way, next time you need to create a new chart, you may simply insert the tasks from the other project and add or remove columns and cells.
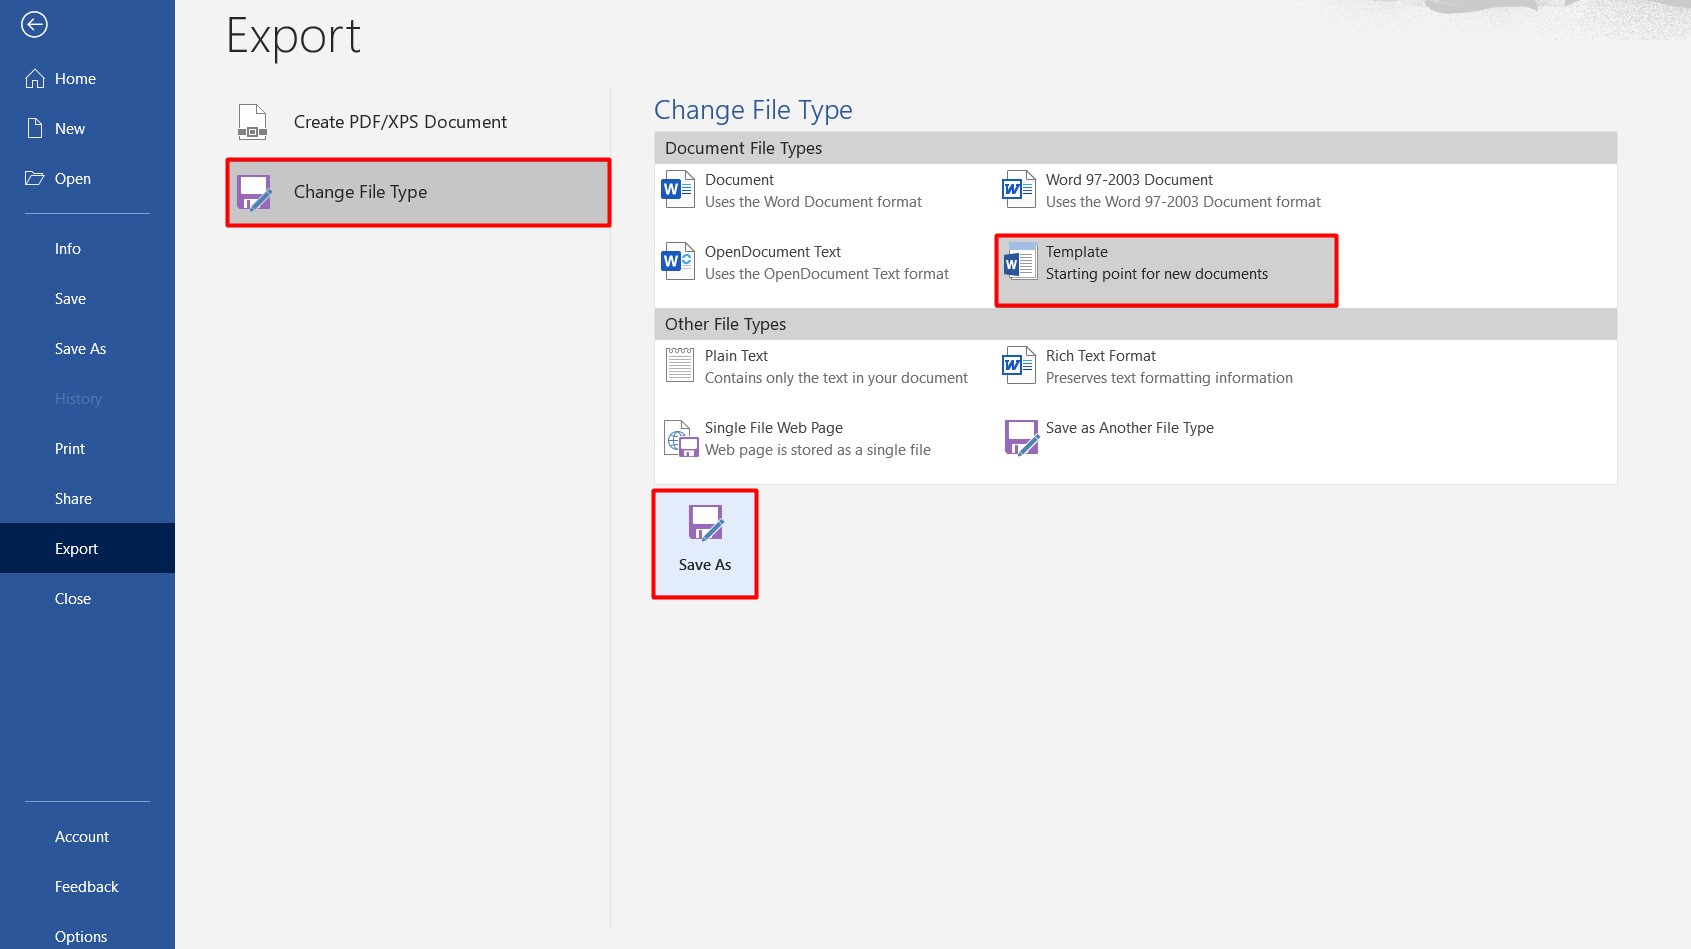
To save the template that will be used to make a Gantt chart in Word in the future, go to File, select Export, then Change File Type, choose Template and click Save As.
Once again: File → Export → Change File Type → Template → Save As.
You’ll see a window where you can save your Gantt chart in Word as a template. Here you can change the name of the template. It is also important to save the template in the Custom Office Templates folder so that you can easily find it later in the list of your personal templates. Click Save.
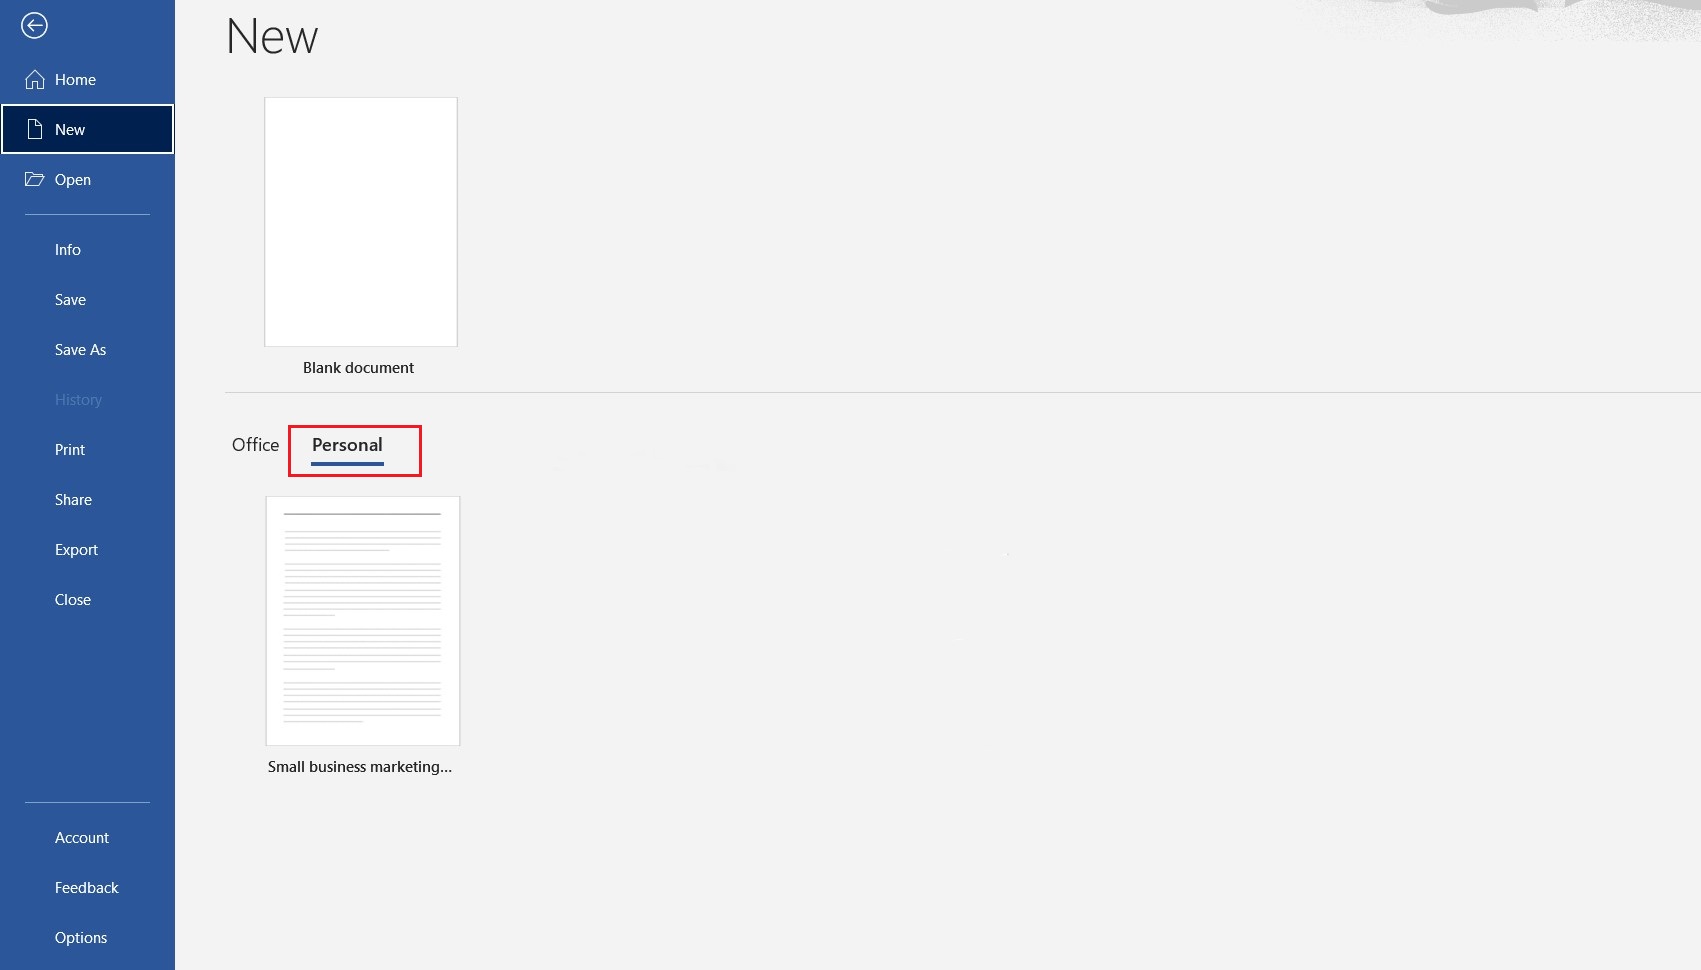
You’ll find the template here:
If you want to download the Gantt chart template in Word that we have made in this tutorial, here you have the two options:
In the first case, you’ll get a template ready for creating a customized Gantt chart. In the second case, you download a ready-made template.
How to export a Gantt chart from MS Project to Word
Another very common question among Microsoft tools’ users is how to export a Gantt chart from MS Project to Word.
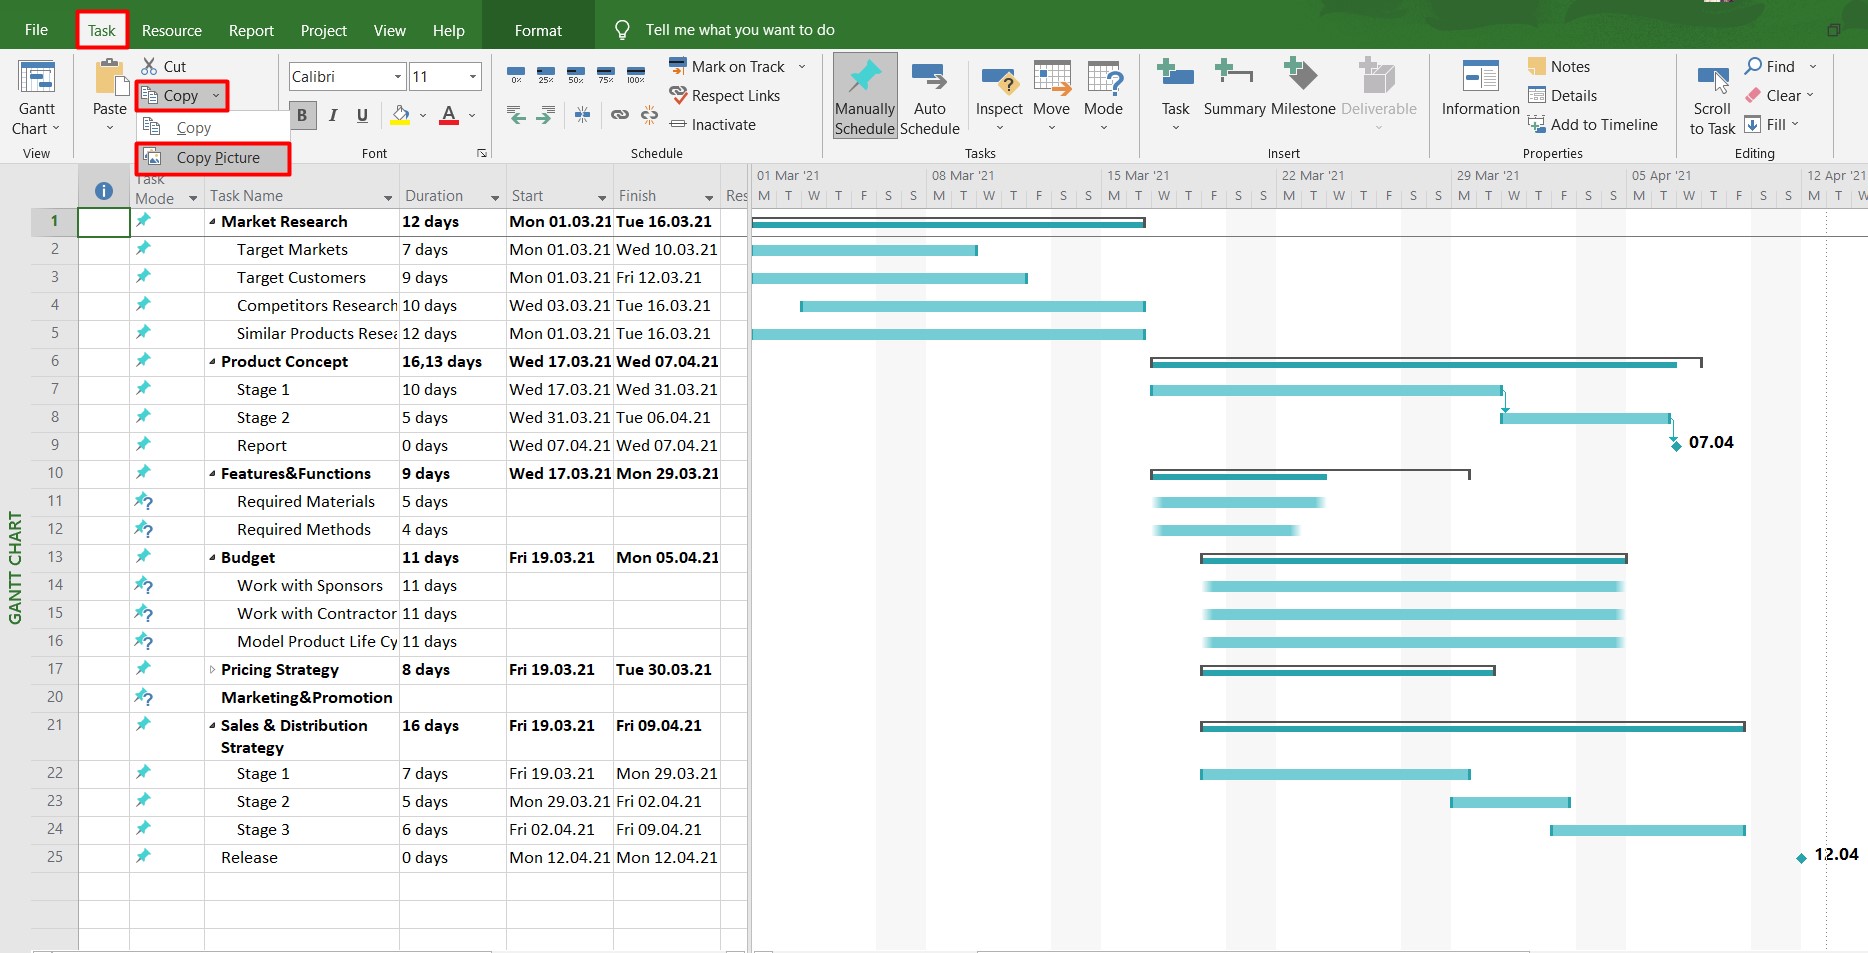
Although the graphic may not look the way you expect it to be, there is a way to do it. You can just copy a Gantt chart into a Word document. For that, open your project in MS Project, choose Task → Copy → Copy image.
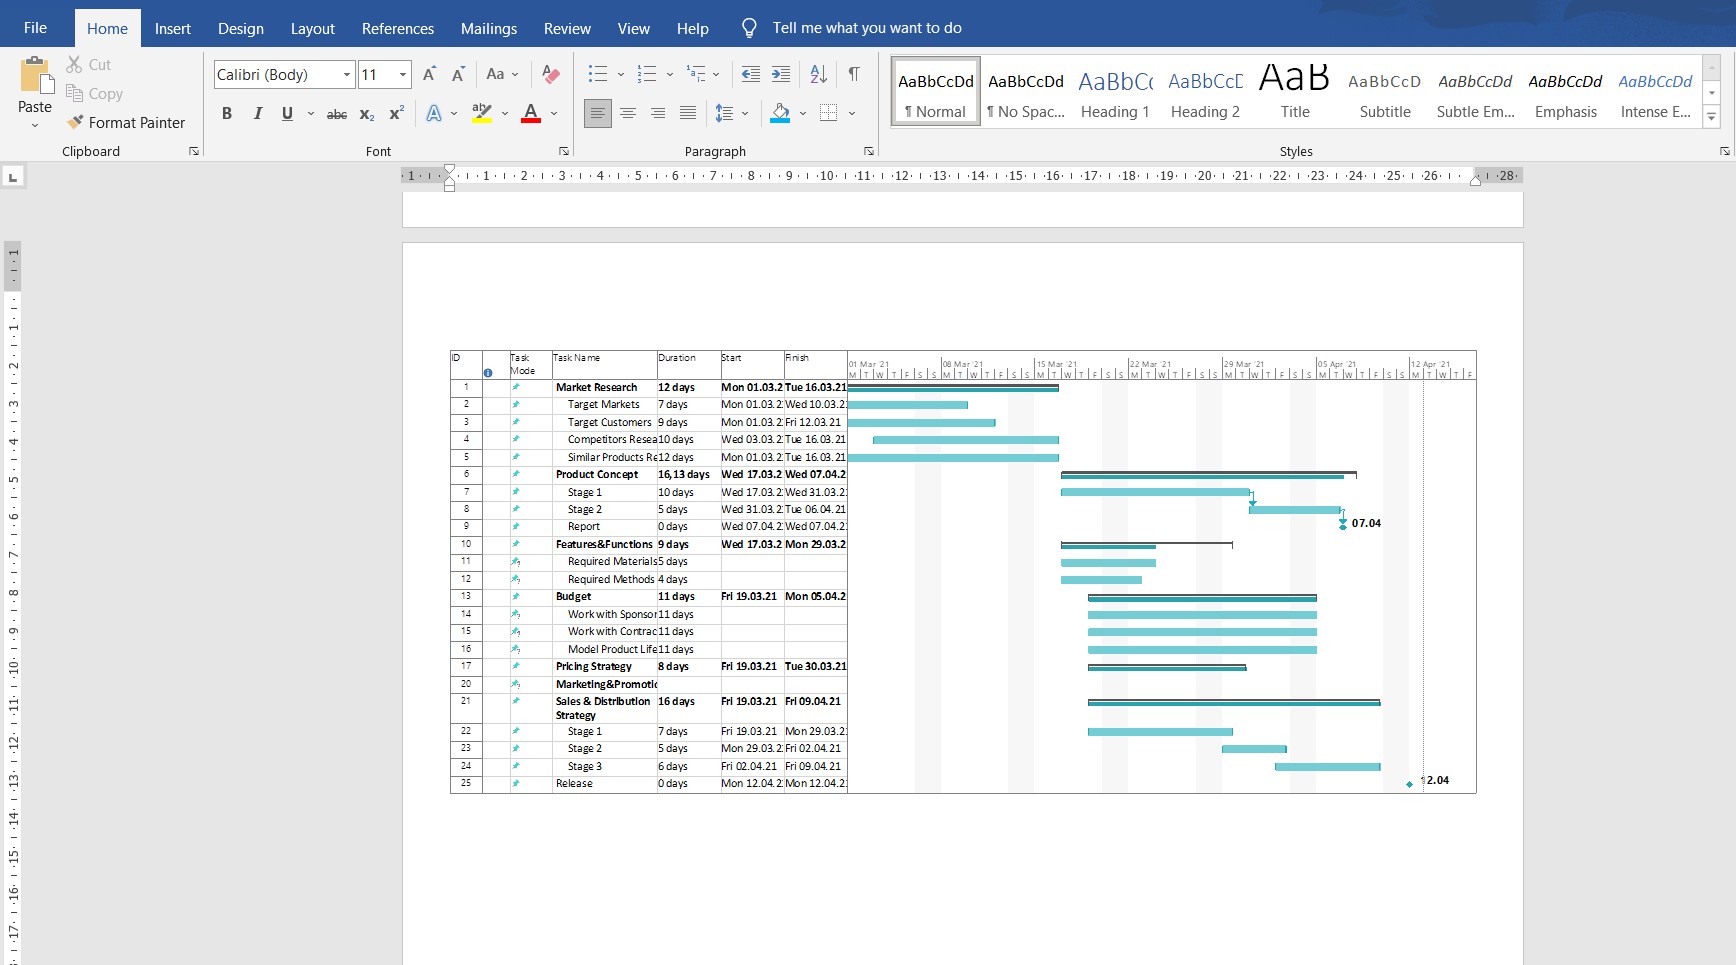
Then open your Word document and do the right click on the blank space where you want to insert the graphic and select Paste.
How to make a Gantt chart easily and fast
As you can see, it is quite easy to make a Gantt chart in Word to manage tasks and workflows. At the same time, keep in mind that the Microsoft Word Gantt chart can be used for fairly basic management when you have a few tasks. If we are talking about more elaborate and complex projects, you can waste a lot of time trying to display your tasks on the graphic and then following them in Word.
Nowadays, there are many professional tools that not only allow you to make a Gantt chart easily, but also offer a wide variety of functions that greatly facilitate the management of tasks, resources, and time.
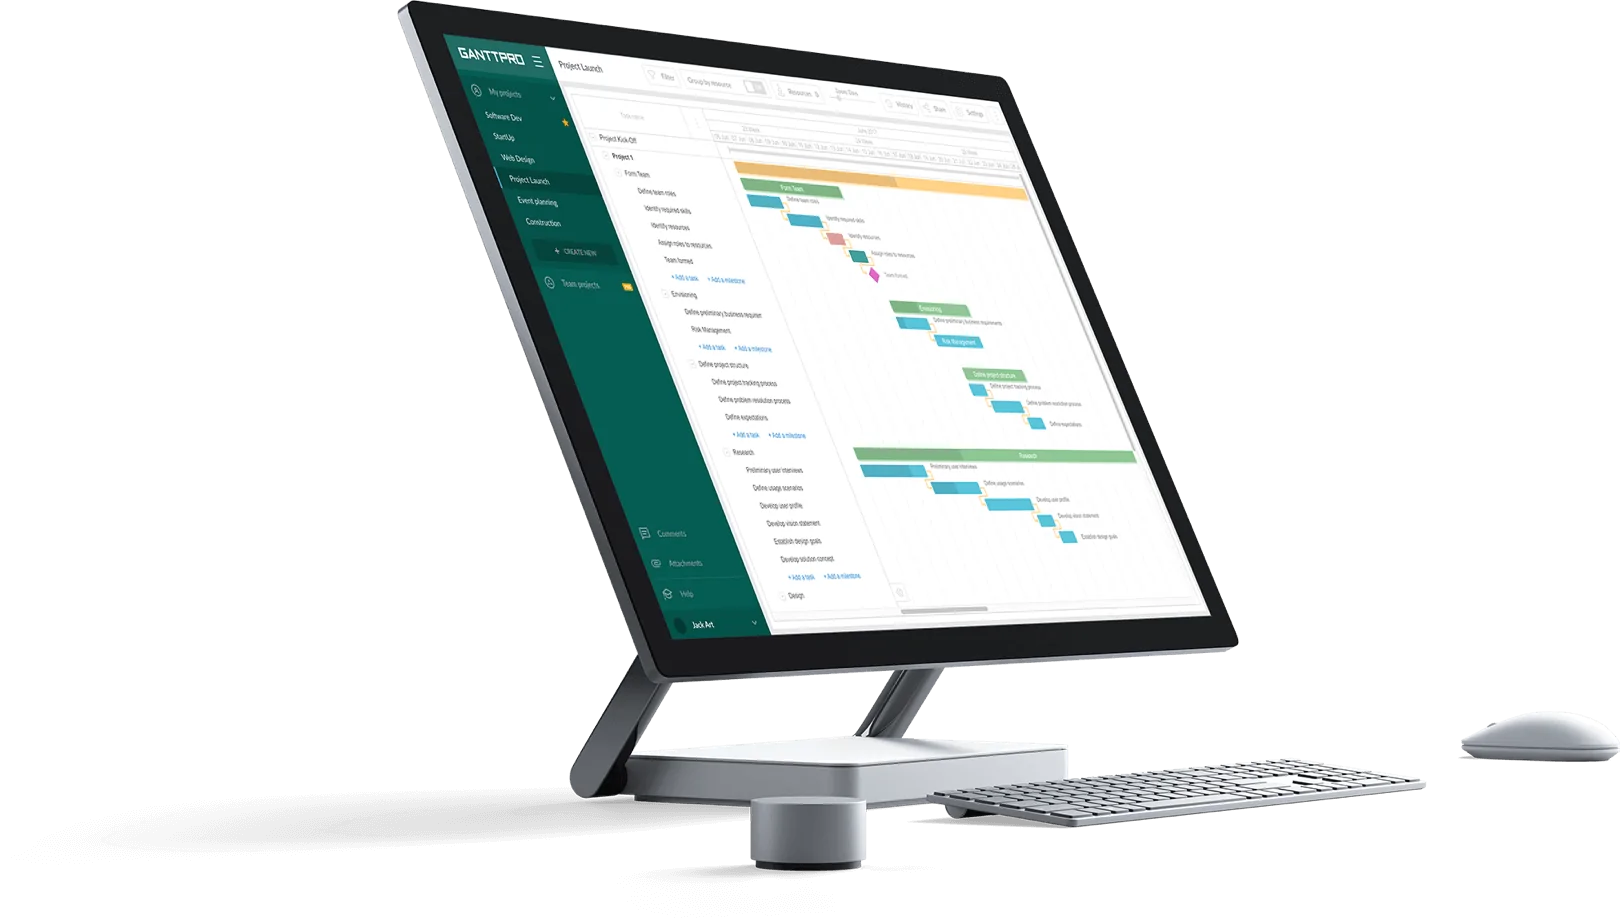
One of these tools is GanttPRO, online project management software based on Gantt charts. The tool’s intuitive interface and a short learning curve will allow you to create your Gantt chart in minutes. The whole process is as simple as possible.
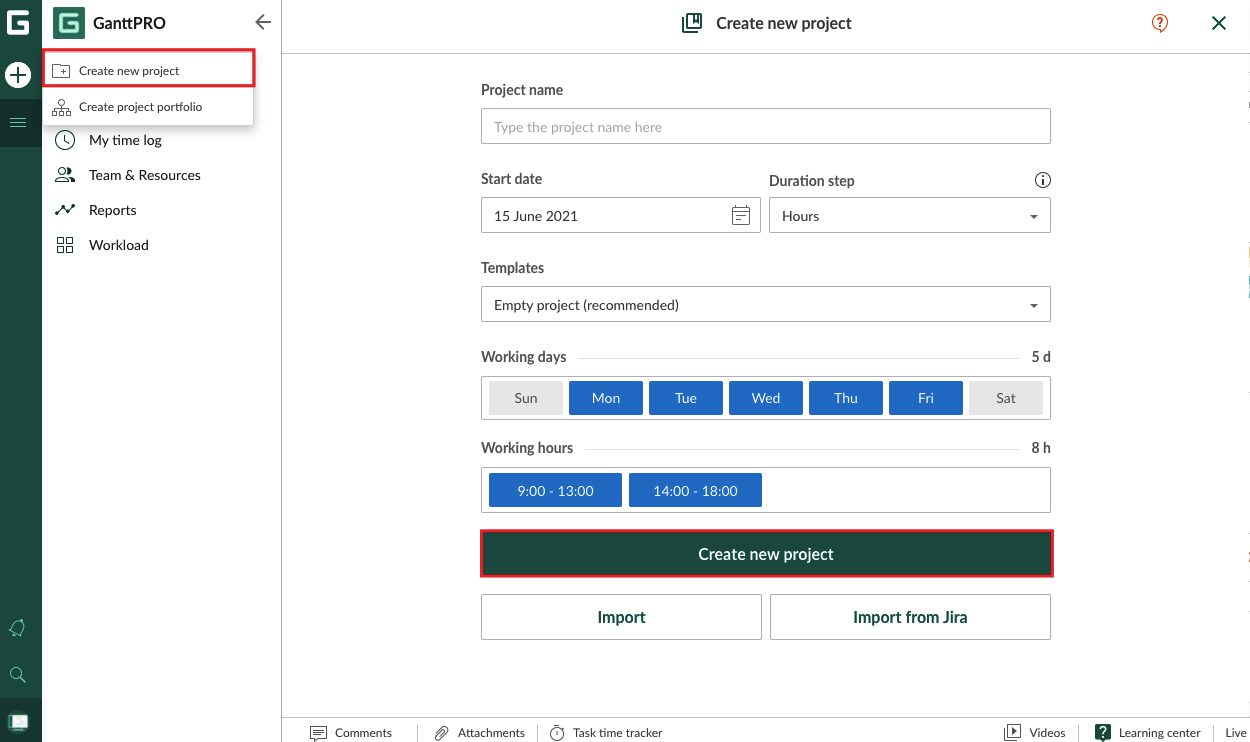
To start you should make an account that you can use for free for 14 days with all the features included. Once you enter the app, you will see a “+” sign in the upper left corner of the screen. Press it and select Create new project.
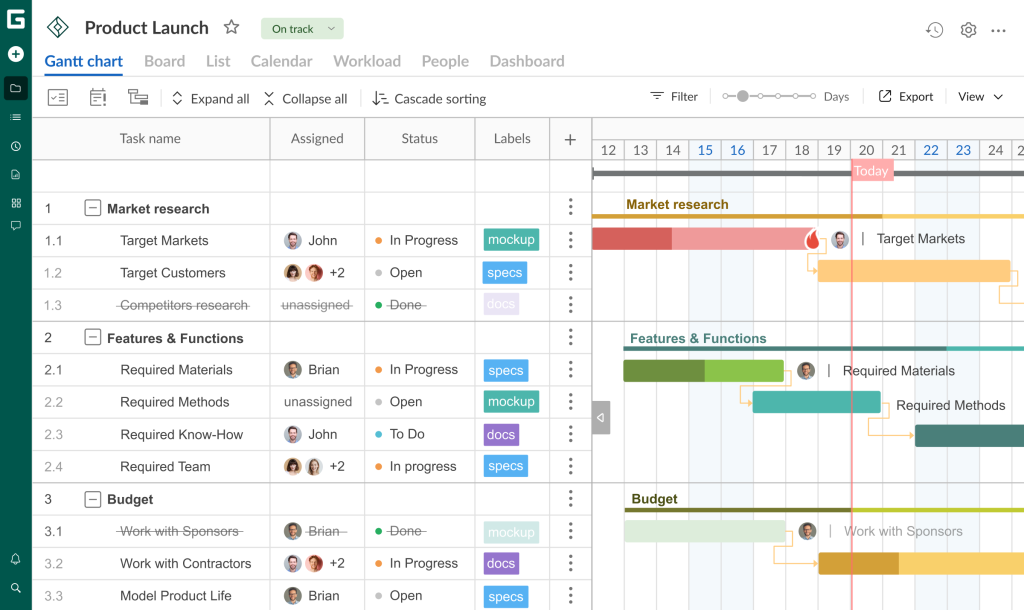
When you create a new project, by default it will be empty. So how do you create a Gantt chart? All you need to do is to follow these easy steps: add tasks and set their dates. To add your tasks, click “Add a task“ at the bottom of the task list, and it will automatically appear on a timeline. In Task settings you can specify the dates for each task.
That’s it. You don’t have to do anything else!
In case you want to download your Gantt chart to insert it into your Word document, you can use the advanced export function in GanttPRO. To do this, go to the right upper corner and select Export. There, you can choose the PNG format and the details of the project that you want to include in the graphic.
After that, open Word and insert the Gantt chart there.
It is worth mentioning that GanttPRO has powerful functionality to work with projects of any complexity and size. In the software you can also:
- Assign tasks to team members and virtual resources
- Track progress
- Control deadlines
- Collaborate: comment, attach files, share graphics or export them
- Manage resources and their workload
- Work with costs and budgets,
- And do many more things
There are also many Gantt chart templates that suit most professional areas and teams.
Thank you so much for this! I discovered new tricks on the word document.