


In Microsoft Project, the timeline is a graphical view of tasks. When managing large projects, providing an easy way to report overall progress to managers and stakeholders can save time and cost.
At the same time, when you manage your project and need to delve into the details of tasks, it proves best to see how the project works and determine whether tasks and deadlines are at risk of slipping.
To create a timeline, a Gantt chart can be used as a management tool. Many project management applications can be used to create them, including Excel and Microsoft Project.
From this article, as a part of our tutorial on MS Project, you will learn how to create a timeline in Microsoft Project.
- How to create a timeline in MS Project.
- How to create multiple timelines in MS Project.
- How to format a timeline in Microsoft Project.
- How to change timescale in Microsoft Project timeline view.
- How to remove a timeline in Microsoft Project.
How to create a timeline in MS Project
Step 1
To create a timeline, click View in MS Project and then select the Timeline in the Timeline box.
- View → Timeline


Step 2
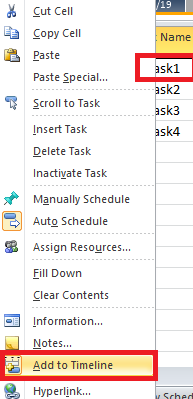
After selecting the timeline, we can add a task to it by right clicking on a task and selecting Add to Timeline. You can add each task to timeline by performing the same process.

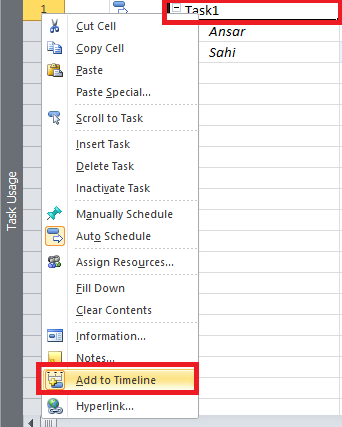
Finally, the timeline is added to your project and displays your task details such as start and finish dates.
How to create multiple timelines in MS Project
Microsoft Project has a powerful feature of making and displaying multiple timelines in a single timeline view.
Here is a procedure of how to create a multiple timeline.
- In Timeline view, select Format → Existing Tasks.


- In Existing Tasks, you can select tasks that you need to add to your timeline.

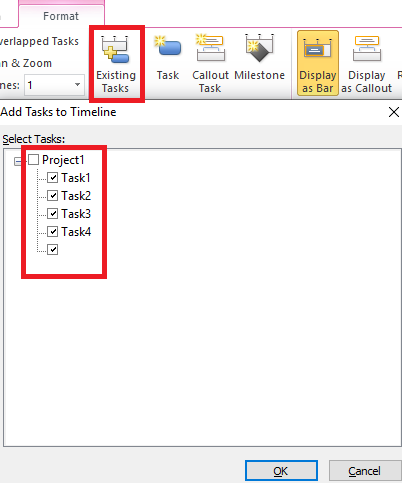
Here, Task1, Task2, Task3, and Task4 are added to the timeline, and each task has a different color to display personalization.
How to format a timeline in Microsoft Project
There are different ways to format timelines.
You can change the font, size, format, and color of the text used on the timeline. You can also change the colors used for the background, timeline bar, and milestones.
Follow the steps below to change the font and color on the timeline in MS Project.
Click on the task title in Timeline to use its Format.


- To change the font used on the Timeline bar, click on the bar. In the Font group on the Timeline tab, you can change the font appearance, size, format, and color.
- To change the color used to fill a bar or milestone, click the bar or milestone, then on the Timeline tab in the Font group, click Highlight Color and select a color.
- To change the color used to fill the Timeline background, click the space in the Timeline that is not filled with bars or milestones. Then in the Font group on the Timeline tab, click Highlight Color and then select a color.
How to change timescale in Microsoft Project timeline view
Most views in MS Project have a timescale that shows the time. You can adjust the timescale to display smaller or greater time units, from years to hours, etc.
Follow the steps below to change timescale in MS Project.
- Click on the Gantt chart that displays the timeline of the tasks associated with the project and click on the task in the Gantt сhart.

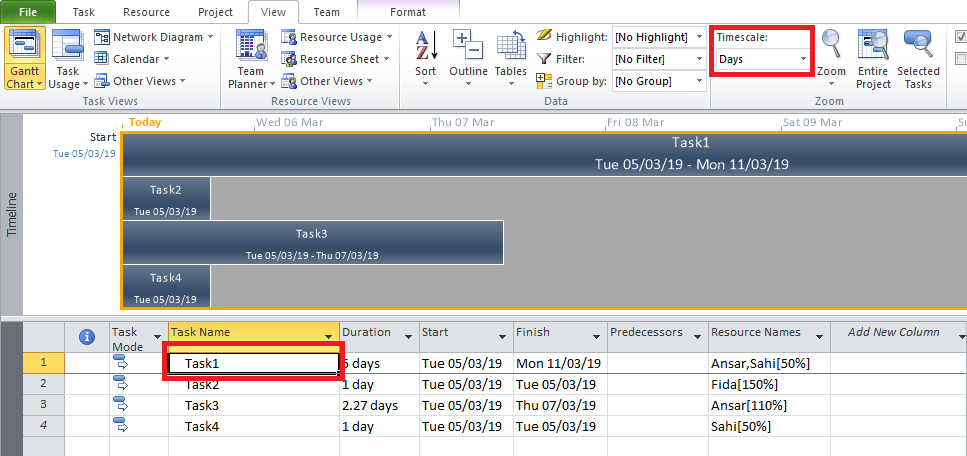
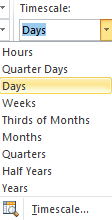
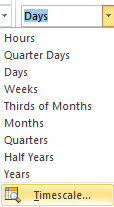
- Click on Timescale dropdown. There are many options to display it. By default, it is set in Days. Select the time unit to display at the bottom of the Timescale. MS Project automatically adjusts the top and middle tiers.

- If you want to manually select the timescale, click on Timescale option in the Timescale box.

In the Timescale box, select the option you want. Here, you can see any changes you made in the Preview box.

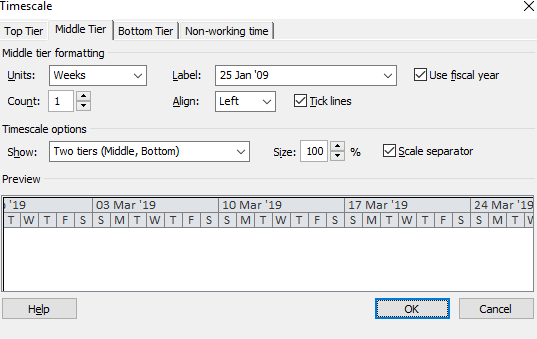
- Units box is used to select the time unit of the timescale tier of the selected tab in the Timescale List box.
- You can specify a number to indicate the frequency of the unit label on the timescale tier in Count list box. For example, if the selected unit is day and you enter 10, the timescale tier will display a 10-day segment.
- Select the label format for the selected time unit in the Label list box.
- Select Left, Medium or Right to align the labels in Align list box.
- Check or uncheck the Tick Lines box to show or hide the vertical lines between the unit labels.
- The Use Fiscal Year list box is used for choosing the format – the fiscal or calendar year.
- You can select the number of tiers to display the timescale in Show dropdown.
- You can increase or decrease the space between units on the timescale tier in the Size list box.
- The Scale Separator box can be selected or unselected to show or hide the horizontal lines between the timescale tier.
How to remove a timeline in Microsoft Project
There are two ways to remove timelines from MS Project. Follow the steps below:
- Remove a task from the timeline by right-clicking on the task title in the Timeline view to display options and choose Remove from Timeline.
- Remove a task from the Timeline by right-clicking the task in the Gantt chart view and unselect Add to Timeline and remove all tasks.

To hide the timeline, untick timeline by choosing View → Timeline. Now Timeline will not be shown in MS Project.


How to create a timeline in GanttPRO
As soon as you register in GanttPRO, you will have the already created timeline. There is no need to look for options in the menu as in the case with MS Project. In our alternative to Microsoft Project, you only need to add tasks and set their start and end dates from one window. That’s it! You will get a visually appealing Gantt chart timeline.
On the top of the screen, find Zoom option. It helps to change timescale of your chart: hours, days, weeks, months, quarters, and years.
No hidden buttons, a short learning curve – you will find it all in GanttPRO.
To create an account in the online Gantt chart software, you need less than a minute.
The following video will help you to realize all the benefits of this MS Project alternative.

To test all the features of the tool, try 14-day free trial.

Gantt chart project management tool
Plan and manage your projects easily with Gantt charts.
Sign up for free