


We continue to introduce you to new great benefits of using GanttPRO.
This time, we are announcing a calendar view, a new way to visualize tasks that will help you plan and schedule your activities and even manage your resources.
Let’s dive deeper into this release.
- Introducing the calendar view.
- How you benefit from using the calendar.
- How to work with the calendar view.
- How to work with tasks in the calendar.
Introducing the calendar view
You may ask us: why have you released it when you already have great options such as Gantt and board views as well as My task list?
Firstly, in this way we expand the capabilities of an online Gantt chart creator for more versatile, and therefore, more efficient planning and management.
Secondly, for some users, a calendar view provides a more familiar way to see their daily tasks with more detail.
How you benefit from using the calendar
Let’s look at the advantages of the calendar and what you can use it for.
- Task and project planning. You can use the calendar for planning if other views do not give you the level of detail and clarity you want. One of its obvious benefits is the short-term perspective: you can easily view your current tasks for today and upcoming ones for weeks and months.
- Scheduling. By scheduling existing and new tasks, you can quickly balance project activities, track progress, and meet deadlines with a clear view of your work.
- Resource and workload management. In the short-term, it makes it easy to assign and manage resources on a daily basis. The calendar will be useful for all project participants: at a glance, assignees will see their current and upcoming tasks, and project managers will know what their team will be working on.
- Resolvement of possible task conflicts. The calendar gives a clear picture of how tasks are organized on a particular day, week or month. Such a visually appealing view will help you easily resolve possible task conflicts.
How to work with the calendar view
To work with the calendar, find the corresponding tab in the header inside your project. Note that this view is available on all GanttPRO plans except for Basic.
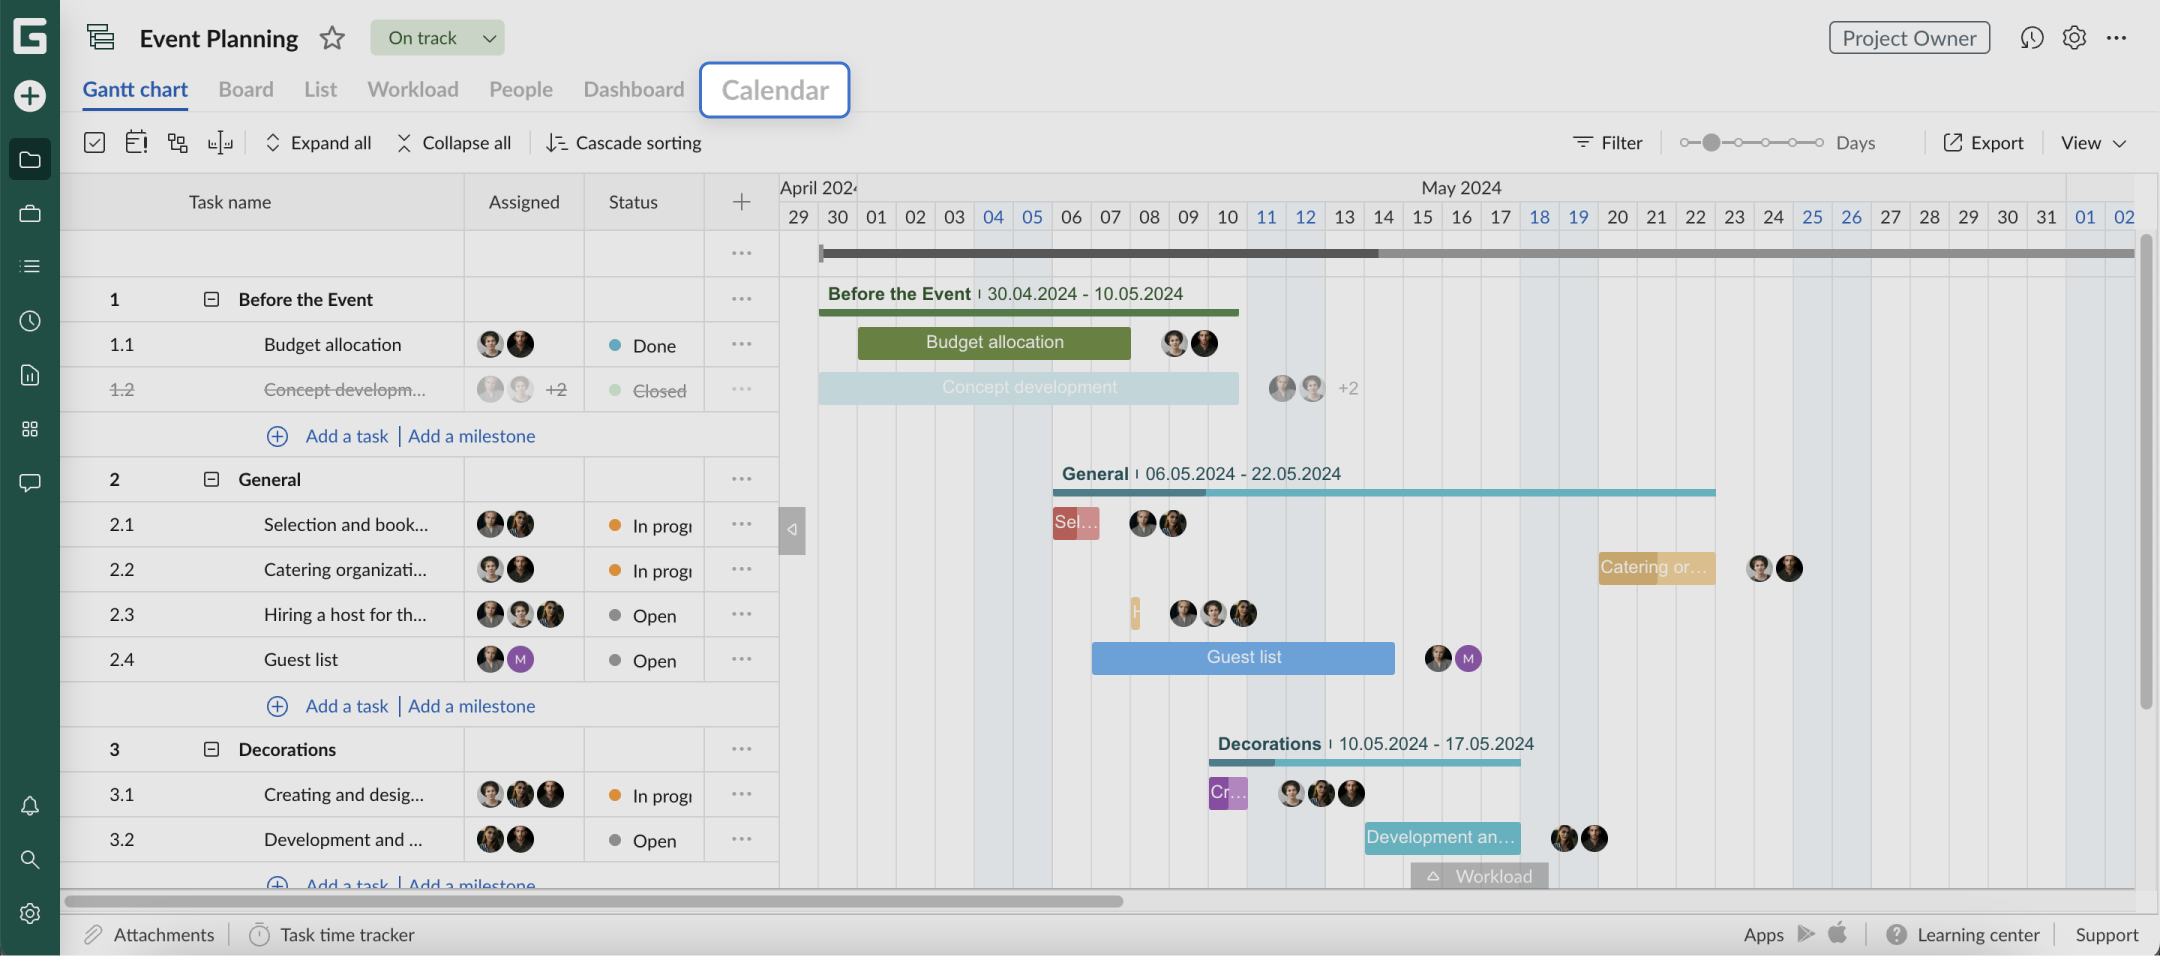
There, you can work with all the tasks of the project you are in. However, task availability depends on the user’s rights and roles.
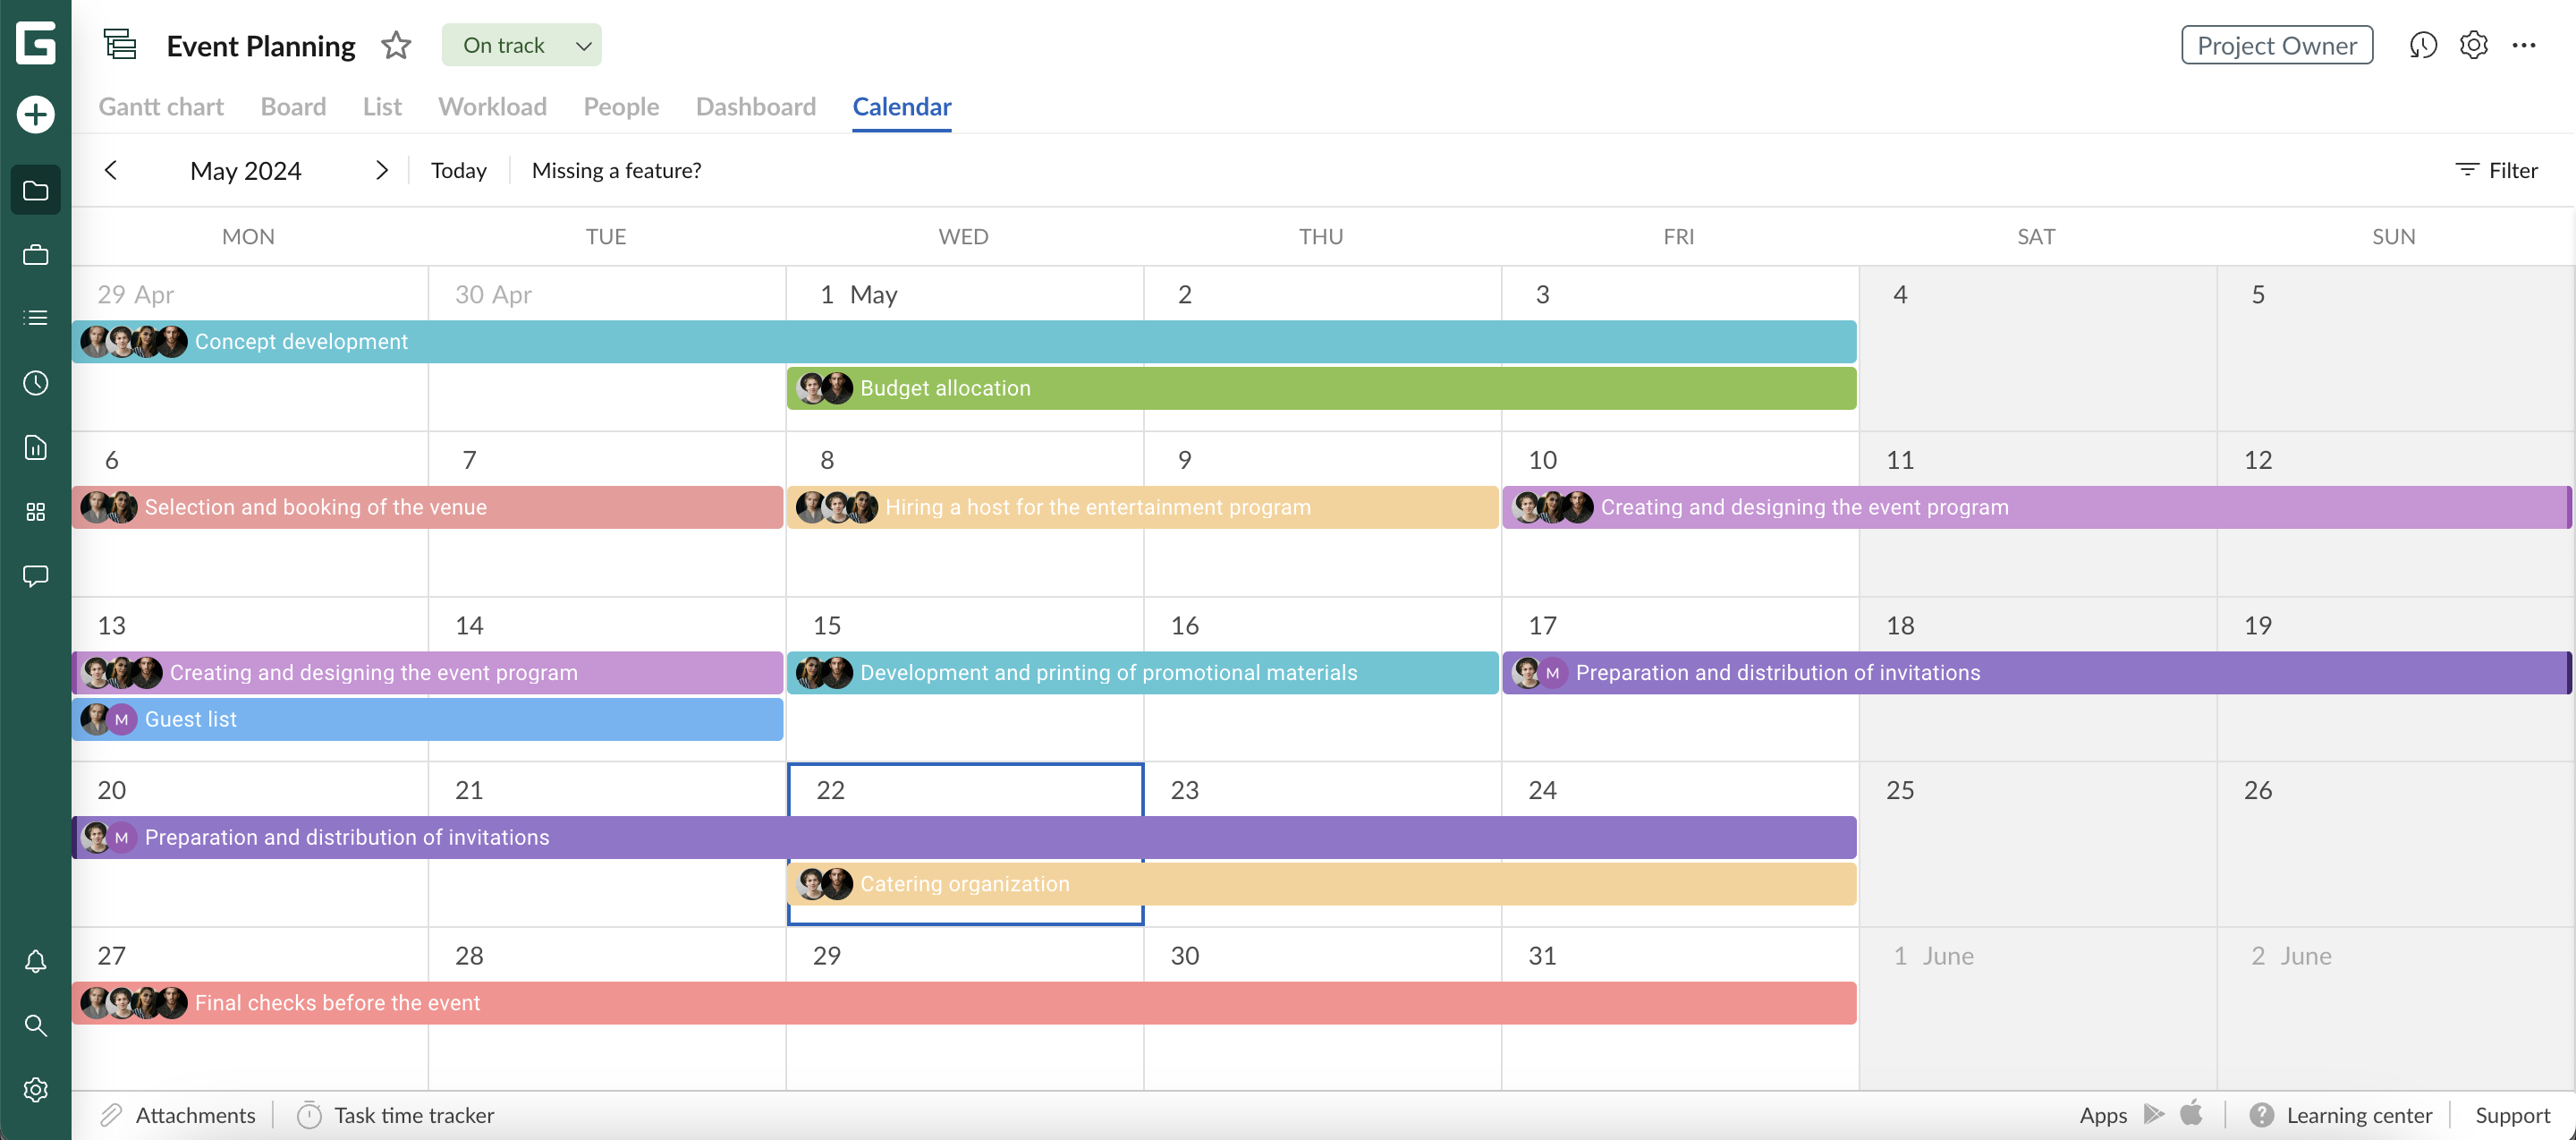
When you open the calendar, you will see a familiar way of task visualization: a working week, weekends, and other non-working days within a month. Note that all non-working days are highlighted in gray and are not available for task creation.
In the top left corner, you can select months to view. Clicking on Today will quickly take you back to the current month. Standard filter options are available in the upper right corner.
Each task shows its name and assignees. Regardless of the task duration, a bar takes the entire width of the cell.
How to work with tasks in the calendar
In the calendar, you can work with existing tasks as well as create new ones. But milestones are not shown here.
Working with existing tasks
Working with existing tasks is simple. As it was mentioned above, each bar shows task name and its assignees. Left-clicking on it will open the settings where you can change its status, priority, assignee, etc. Also, hovering over a bar will open a popover with detailed information.
At the same time, you can rearrange your assignments using drag and drop. You can also change the duration of any task by hovering your mouse over its end and stretching it.
Creating new tasks
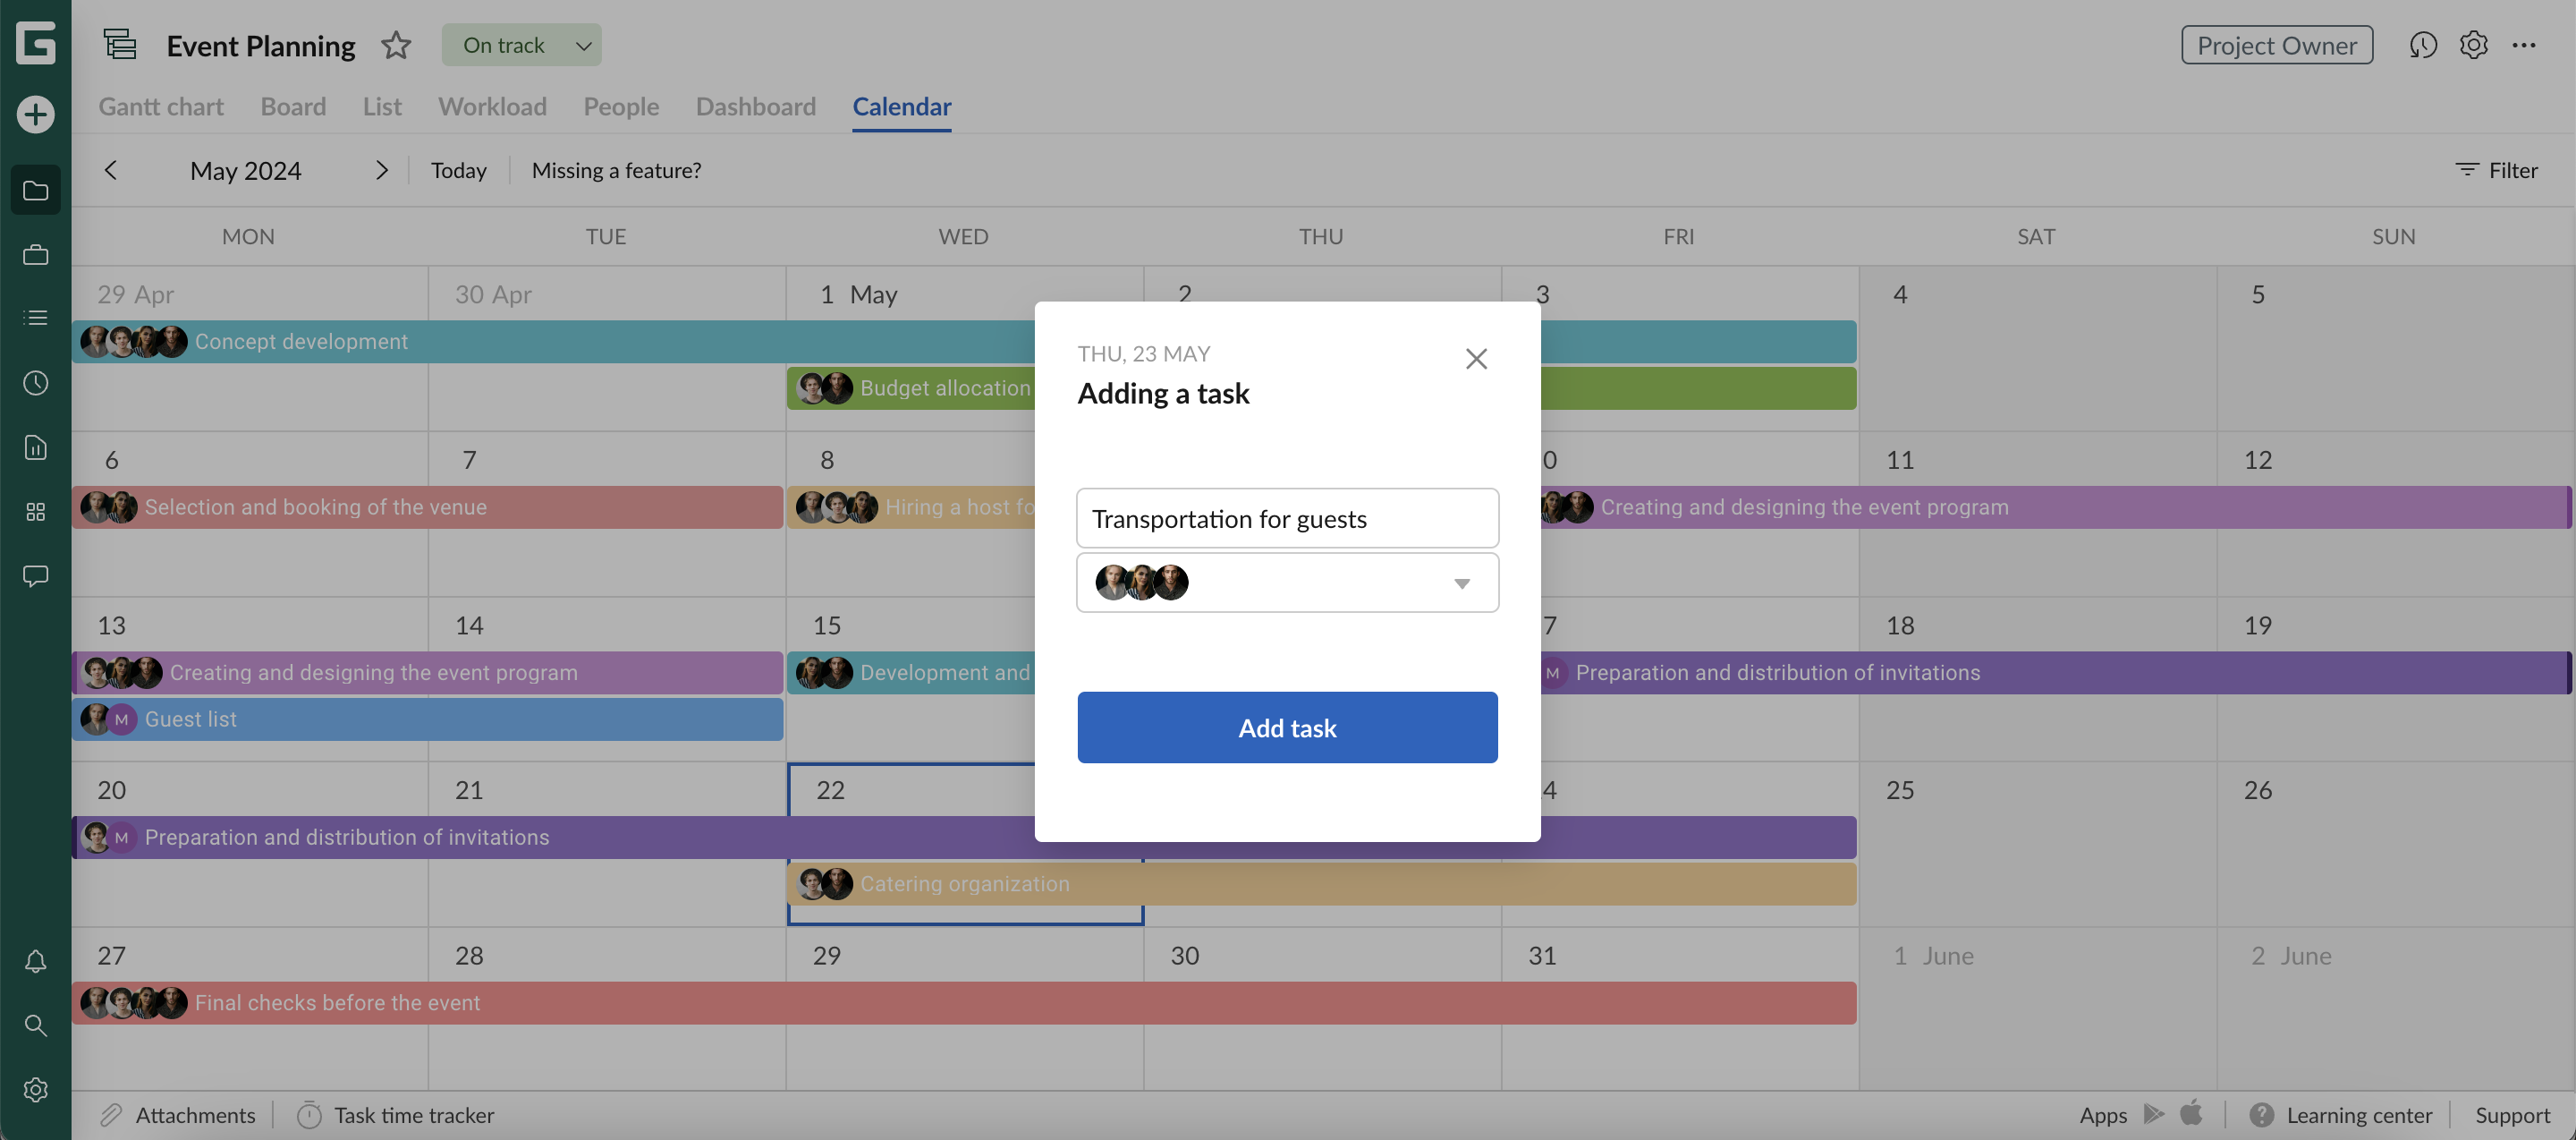
Task creation is absolutely intuitive. For this, hover your mouse over the desired day and click on the + icon. In the window that appears, the only thing you need to do is name your task. Optionally, you can also add assignees here.
Need help?
If you have questions about how to work with the calendar, ask us in the Live chat.